Herbalist starter kit — by the end of this hands-on guide you’ll have a complete, budgeted home kit, three simple remedies made, and a maintenance plan. Expect 3–6 hours of hands-on setup spread over a weekend; skill level: absolute beginner with basic kitchen experience.
Before you start
- Clear workspace (clean table, towel, good natural light).
- Basic kitchen skills (measuring, using a stove, sterilising jars).
- Access to a digital scale (0.1 g precision recommended) and measuring spoons.
- Local supplier or online retailer account for ordering dry herbs and equipment.
- Notebook or digital journaling app for tracking recipes, batches and reactions.
What is a Herbalist Starter Kit and Why You Need One
This herbalist starter kit is a compact collection of tools, a small set of reliably safe herbs, containers and reference materials designed to let a beginner make common preparations at home: infusions (teas), tinctures (alcohol extracts), salves (oil + beeswax), poultices and simple decoctions.
Why you need one: a dedicated kit reduces cross-contamination with kitchen food, makes dosing consistent, and contains the right tools so first remedies succeed. A kit also builds habits: measuring, labeling, storing—and that practice is how safe herbalism becomes repeatable and effective.
Quick benefits:
- Consistent results: appropriate jars, droppers and scales give reproducible doses.
- Safety and hygiene: separate tools limit contamination and allergic exposure.
- Learning curve: a curated set of herbs and recipes keeps early projects simple and successful.
To deepen context on supplement roles in home herbalism, pair this practical kit with the herbal supplements guide with benefits.
Transition: with the rationale clear, next we’ll itemise the equipment that turns dried leaves and oils into useful remedies.
Essential Tools to Include in Your Herbalist Starter Kit
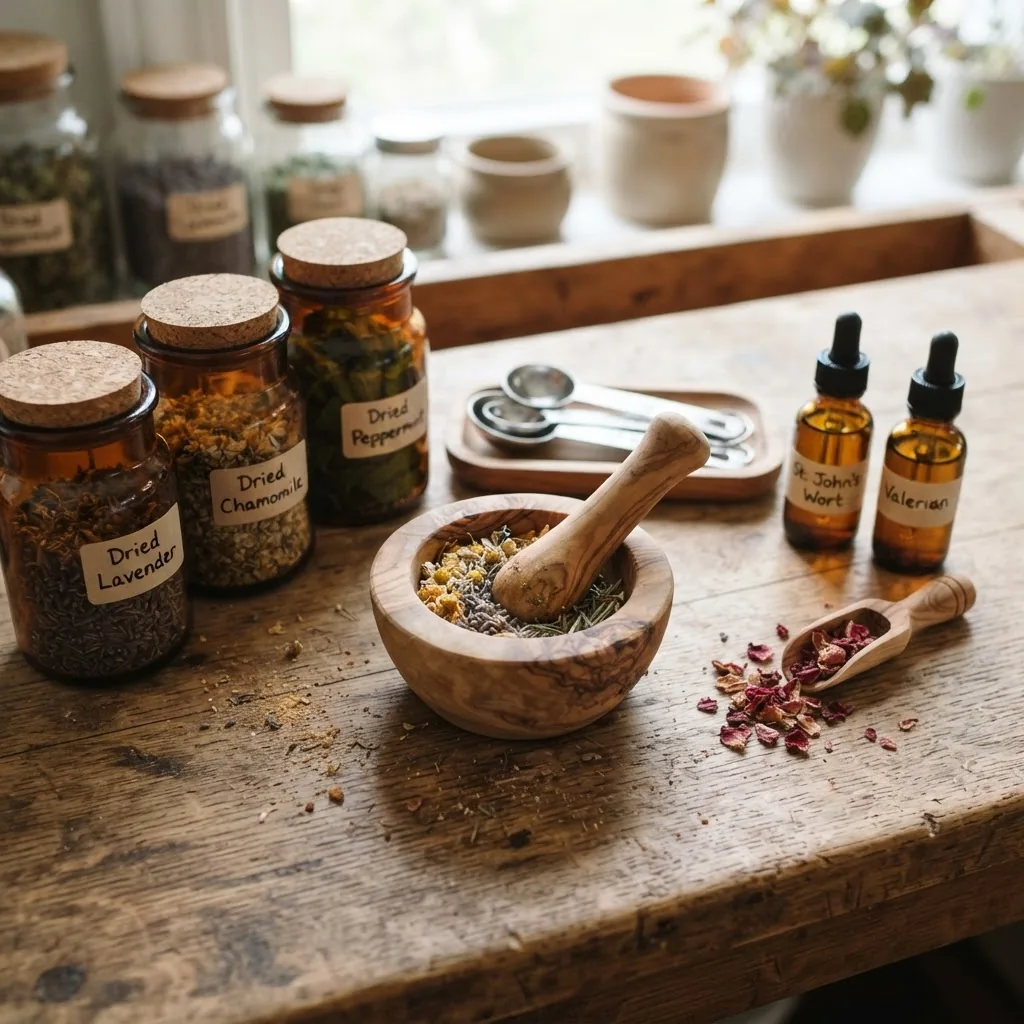
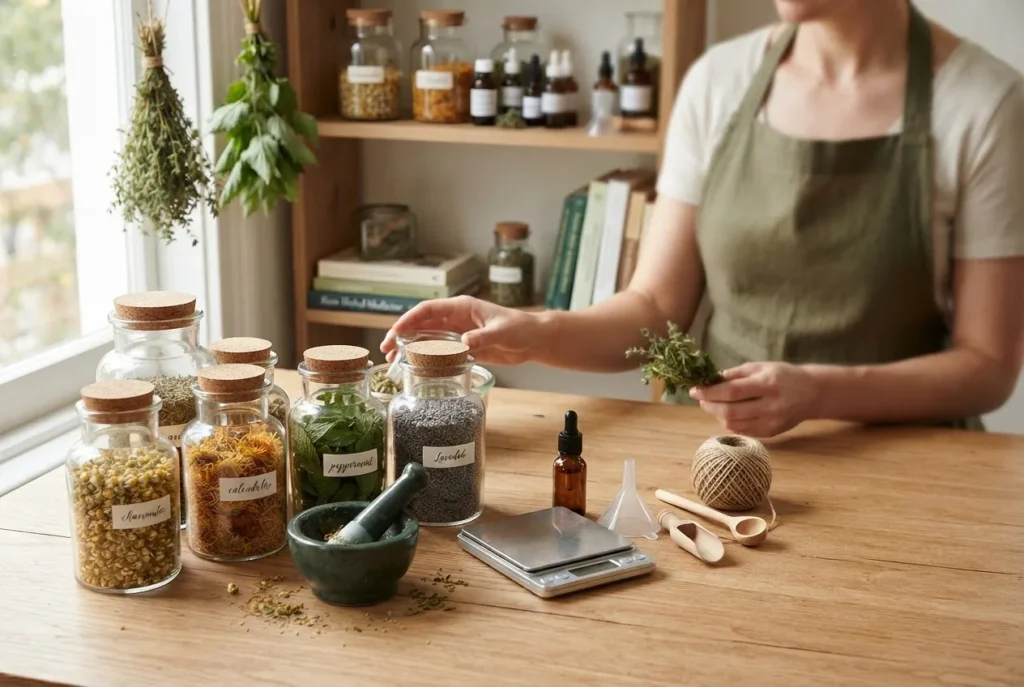
- Mortar and pestle — medium-sized ceramic or hardwood set (10–12 cm bowl). Use: grinding leaves and seeds to increase surface area before infusions or salves. Tip: clean with hot water and a scrub brush; don’t soak wooden sets overnight.
- Digital scale — 0.1 g precision, 500 g capacity. Use: accurate dosing for tinctures (e.g., 1:5 extracts) and powdered capsules. Tip: tare the container before measuring.
- Measuring spoons and cups — stainless steel set (1 tsp, 1 tbsp) and 250 ml glass measuring cup. Use: rough weighing for teas and oil ratios (e.g., 1:5 herb:solvent when using volume approximations).
- Glass jars and bottles — amber 100 ml and 250 ml bottles with droppers, amber 500 ml jars, and clear 250 ml mason jars. Use: tinctures keep best in amber bottles; infusions and salves in wide-mouth jars for scooping.
- Dropper caps and screw lids — for dosing tinctures and liquids. Tip: silicone droppers are gentler for delicate tinctures; test fit before bottling.
- Fine mesh strainer and cheesecloth — for separating solids from liquids. Tip: double-layer cheesecloth gives clearer tinctures.
- Small funnel and herbal scoop — a 20 mm stainless funnel for filling droppers and small jars without spills.
- Beeswax, carrier oils and labels — beeswax pellets (50 g starter), carrier oils (250 ml olive or sweet almond), and waterproof labels + permanent marker. Use: make ~50–100 g salves; label batch, date and ratio.
- Mortar/pestle alternative: coffee grinder (dedicated) — only if you choose a separate, dedicated grinder for herbs (avoid food cross-use).
- Heat source — small slow cooker or double boiler insert for gentle oil infusions (keep <60 °C). Tip: use a thermometer; maintain oil temperature 45–60 °C for a timed 4–6 hour infusion.
- pH test strips and thermometer — useful if you plan more advanced preserves or emulsified products.
- Notebook and labels — a bound journal for batch notes (herb, weight, solvent, date, use) and waterproof labels for jars.
- First aid and sanitizer — isopropyl alcohol 70% for surface cleaning, soap, and gloves for allergy-prone users.
Usage tips and short checklist:
- Buy amber glass for light-sensitive extracts.
- Keep a small kit tray for “in-use” items to limit dust contamination.
- Sanitise jars by boiling for 10 minutes or using a dishwasher sterilise cycle (glass only).
Transition: the next section lists safe, versatile herbs to stock first—each chosen for multi-purpose use and gentle safety profiles.
Key Herbs for Your Herbal Remedy Starter Kit
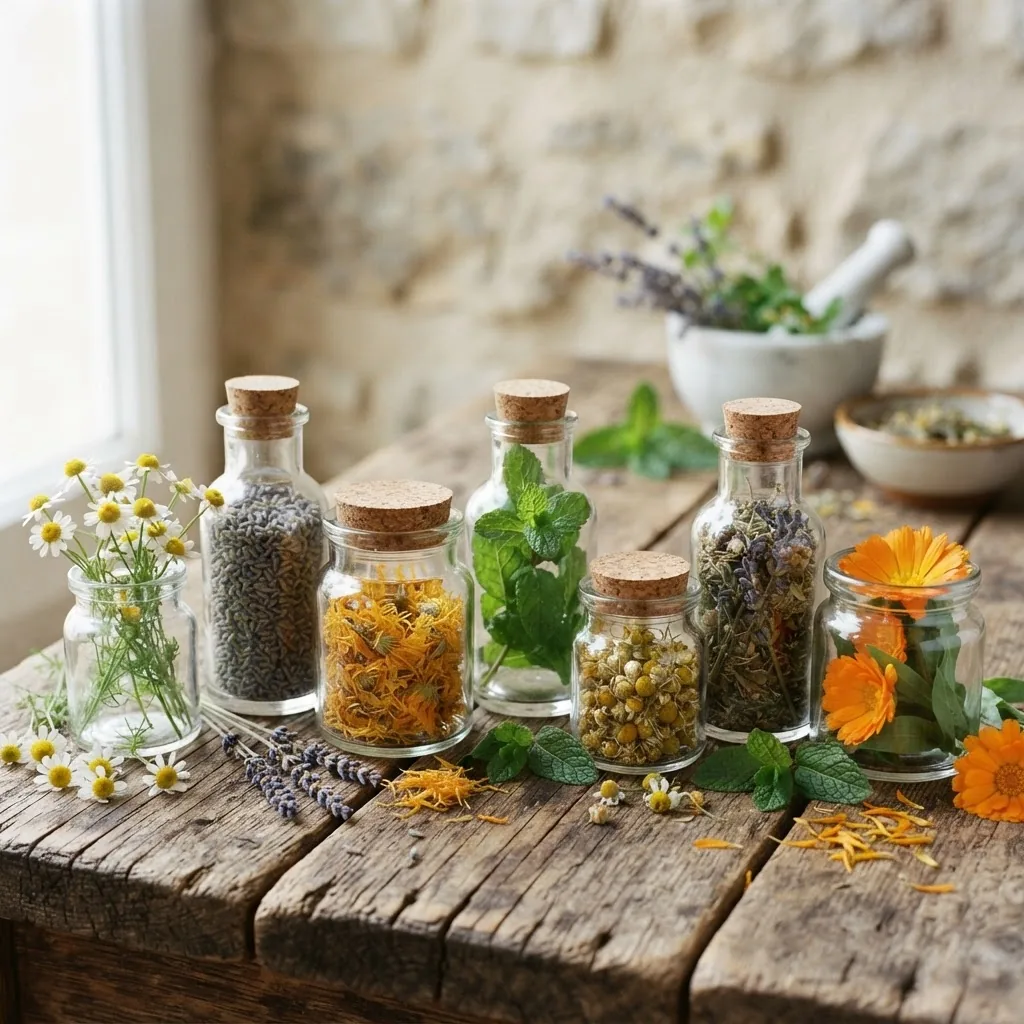
Start with 6–10 single-ingredient herbs you can use in teas, tinctures and topical preparations. Buy small quantities (25–100 g) to rotate stock and to practice identifying smell and taste profiles.
- Chamomile (Matricaria chamomilla) — uses: calming infusion for sleep, mild digestive support, and topical anti-inflammatory washes. Constituents: flavonoids like apigenin (calming) and chamazulene (anti-inflammatory). Sourcing tip: whole flower heads, organic dried 25–50 g. See peer-reviewed evidence via peer-reviewed phytotherapy research.
- Peppermint (Mentha x piperita) — uses: digestive infusions, inhalation for headaches, and cooling topical compresses. Constituents: menthol and menthone (carminative, antispasmodic). Sourcing: fresh leaves in season or dried 25–50 g; avoid in infants or severe GERD.
- Calendula (Calendula officinalis) — uses: topical salves, wound-healing oils, and soothing washes. Constituents: triterpenoids and flavonoids supporting skin repair. Sourcing tip: organic dried petals, 25–50 g; make oil infusions for salves.
- Lavender (Lavandula angustifolia) — uses: calming infusion, aromatherapy, and topical blends for minor burns or insect bites. Constituents: linalool and linalyl acetate (sedative, anti-inflammatory). Use 10–30 g dried flowers.
- Calendula + Lavender blend — easy topical duo for salves (oil infusion 20 g herb per 100 ml oil).
- Ginger (Zingiber officinale) — uses: fresh or dried for decoctions to relieve nausea; potent warming constituent gingerols. Sourcing: fresh root or dried slices; store refrigerated or freeze slices.
- Yarrow (Achillea millefolium) — uses: astringent and circulatory support; good for compresses and small wound care. Caution: test small skin patch; avoid in pregnancy.
- Licorice (Glycyrrhiza glabra) — optional — use small amounts in digestive or adrenal-support tinctures; caution: high doses raise blood pressure. Use powdered or sliced root; tincture ratios 1:5.
- Nettle leaf (Urtica dioica) — uses: nutrient-rich infusion, supportive for seasonal allergies when used regularly; harvest young leaves or buy dried 25–50 g.
- Rosehips — vitamin C-rich decoctions; use 30–50 g dried hips for syrups and teas.
For broader supplement context, see the botanical dietary supplements benefits overview and the capsule herbal supplements guide for different delivery formats.
Transition: you’ve chosen tools and herbs; next learn the exact preparations you can make immediately with this kit.
Basic Herbal Preparations You Can Make with Your Kit
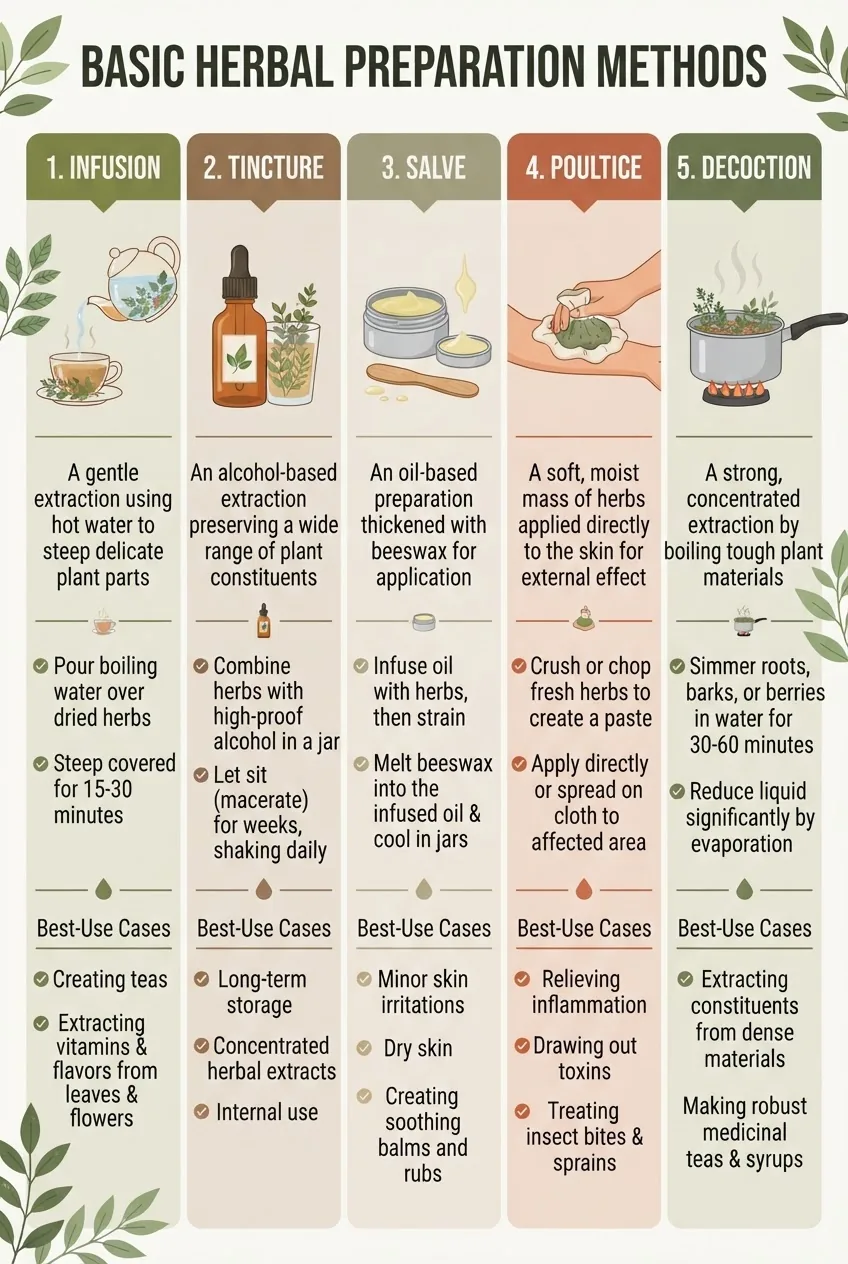
This section gives step-by-step methods for making five starter remedies you can complete with your kit. Definitions: a tincture is an alcohol extraction (common ratios 1:5 or 1:2 herb:solvent by weight), an infusion is a steeped tea, and a decoction is a boiled extraction for tougher plant parts (roots, bark).
-
Make a chamomile infusion (calming tea)
Yield: 1 cup (250 ml)
- Measure 2 g (about 2 tsp) dried chamomile flowers into a teapot or cup.
- Boil 250 ml water, pour over herb, cover and steep 7–10 minutes.
- Strain through a fine mesh or double-layer cheesecloth; drink warm. Dose: 1 cup at bedtime; max 3 cups/day for adults.
Notes: chamomile contains flavonoids (apigenin) linked to relaxation in clinical studies (see peer-reviewed phytotherapy research).
-
Prepare a basic 1:5 tincture (alcohol extract)
Yield: ~100 ml tincture
- Weigh 20 g dried herb (or 100 g fresh) and place in a 250 ml glass jar.
- Add 100 ml 40–60% ethanol (vodka 40% is acceptable) for a 1:5 dry herb tincture by weight.
- Seal with a lid and label: herb, ratio 1:5, start date. Store in a cool, dark place for 2–6 weeks, shaking daily.
- After extraction, strain through cheesecloth, press the herb mass to recover liquid, bottle in amber dropper bottles, and label with the final volume and date. Typical adult dose: 1–2 ml (20–40 drops) up to 3 times/day depending on herb potency.
Cautions: alcohol tinctures are contraindicated for those avoiding alcohol; consider glycerites (glycerine extracts) as alcohol-free alternatives.
For specialized uses, see the herbs supporting cancer care guide.
-
Make a calendula oil infusion and salve
Yield: ~120 ml infused oil → ~60 g salve
- Place 20 g dried calendula petals in a clean jar and cover with 200 ml carrier oil (olive or sweet almond).
- Warm using a double boiler or slow cooker at 50–60 °C for 4–6 hours (gentle heat) OR cold-infuse in a sunny window for 4–6 weeks, shaking daily.
- Strain and measure infused oil. For salve: melt 15 g beeswax per 100 ml oil (ratio here: 15% beeswax for a soft salve). Stir gently, pour into tins, cool and label with date and herb ratio.
Uses: apply to minor abrasions, dry skin, or as a protective barrier. Shelf life: 6–12 months refrigerated; label with expiry date.
-
Make a ginger decoction (anti-nausea)
Yield: 250–300 ml
- Slice 10 g fresh ginger (about 1 tbsp) or 3 g dried. Place in a small pot with 300 ml water.
- Bring to a gentle boil, reduce heat and simmer uncovered 10–20 minutes.
- Strain and add lemon or honey. Dose: 60–100 ml every 2–4 hours as needed (adults).
Notes: stronger extraction than an infusion; decoction is the correct method for roots and tougher material.
For cultural herbal approaches, consider reading about traditional Chinese herbal remedies.
-
Prepare a quick poultice (localised topical relief)
Yield: enough for one local application
- Crush 10 g fresh herb (e.g., plantain leaf or yarrow) with mortar and pestle, or finely chop.
- Mix into a paste with a teaspoon of warm water or infused oil, place on clean cloth, and apply to the affected area for 15–30 minutes. Keep skin protected and check every 10 minutes.
Notes: always test a small patch of skin before extended poultice use.
Transition: successful preparations require correct storage and maintenance to remain safe and potent—covered next.
How to Store and Care for Your Herbalist Kit Components
Good storage preserves potency and prevents mould, insect contamination or photodegradation. Treat herbs much like pantry items: cool, dark and dry.
- Airtight containers — use amber glass jars with tight lids for dried herbs and extracts; vacuum-sealed pouches for bulk storage.
- Sunlight protection — always store tinctures and light-sensitive oils in amber bottles away from windows.
- Temperature — 10–20 °C is ideal for dried herbs; oils keep longer refrigerated (especially nut oils prone to rancidity).
- Ingredient shelf life — dried herbs: 1–3 years (leaf/flower shorter), ground powders: 6–12 months, infused oils: 6–12 months refrigerated, tinctures: 3–5 years if stored dark and cool.
- Labeling and documentation — every container: herb name (botanical + common), batch date, solvent, ratio and use-by date. Keep a notebook entry with the same info for cross-reference.
Maintenance checklist:
- Weekly: inspect in-use herbs for moisture or insects.
- Monthly: rotate stock using oldest-first method and discard any off-odour items.
- Every batch: note any colour change in oils (rancidity) or cloudy tinctures (possible contamination) and discard if suspicious.
Transition: while storage protects your work, safety rules and contraindications ensure you and others stay well when using the kit.
Safety Guidelines and Best Practices for Beginner Herbal Remedy Makers
Safety is central. A few clear rules protect you and those who use your remedies.
- Consult a professional first — always advise anyone with chronic conditions, pregnant or breastfeeding people, children, or those on prescribed medication to consult a healthcare provider before using herbal remedies. For legal scope and prescribing differences, review naturopathic medication prescribing laws.
- Allergy patch test — for topical products: apply a pea-sized amount on inner forearm, cover and check after 24 hours for redness or itching.
- Dosage limits — follow specific herb dosing guidelines; for tinctures typical starting doses are 0.5–2 ml (10–40 drops) 1–3 times/day unless a known clinical protocol dictates otherwise.
- Drug–herb interactions — check interactions (e.g., St John’s Wort with many medications). Use a reputable interaction checker and consult a pharmacist or naturopath when in doubt. See our tool: Herbal Drug Interaction Checker Tool and Usage Guidelines.
- Hygiene practices — wash hands, sterilise jars, use clean utensils and avoid cross-contamination with kitchen food. Use gloves if you have skin sensitivities.
- Document reactions — keep a simple log: date, product, dose, reaction, action taken. This helps identify sensitivities quickly.
Authority and quality frameworks: follow government and professional guidance when evaluating herbs and safety procedures. For regulatory and safety frameworks consult the FDA dietary supplement guidance and Australian frameworks at the TGA complementary medicines pages. For professional standards refer to associations such as the American Herbalists Guild.
Experience note: I have seen two common beginner errors: over-concentrated tinctures due to incorrect ratios, and using fine powders where a whole herb was needed—both avoidable by precise weighing and following recipes.
Transition: sourcing quality materials reduces risk and improves outcomes—read on for where to buy.
Where to Buy Quality Supplies and Herbs for Your Herbalist Starter Kit
Buy from suppliers who provide clear sourcing information, batch numbers and basic testing (for contaminants where applicable). Compare online vs local:
- Local herb shops/farmers markets — advantages: inspect herb aroma and freshness; ask vendor about harvest and storage. Useful for fresh herbs and small purchases.
- Reputable online suppliers — advantages: greater selection, standardised packaging, customer reviews and lab testing details. Look for organic certification or third-party testing statements on heavy metals/pesticides.
- Apothecary suppliers — buy tools and packaging (amber bottles, droppers) from apothecary supply stores to ensure correct labware quality.
Quality indicators to look for:
- Clear botanical name (Latin binomial), harvest/pack date, batch/lot number.
- Organic certification or a supplier statement about pesticide testing.
- Third-party lab testing or Certificates of Analysis for powders and bulk extracts.
When buying online, prioritise suppliers with return policies and visible customer service. For methods and safety frameworks, consult government guidance such as the FDA and TGA pages.
Transition: sourcing and supplies aside, building confidence is the next critical step—practical tips follow.
Tips for Getting Started: Building Confidence as a Beginning Herbalist
Start small, track everything, and lean on community and formal training when needed.
- Begin with three projects — choose one infusion (chamomile), one tincture (single-herb 1:5), and one topical (calendula salve). Limit the first weekend to these so you learn methods without overwhelm.
- Journal every batch — record herb name, part used, weight (g), solvent, ratio, maceration time and observed effects. Example entry: Chamomile infusion — 2 g in 250 ml, steep 8 min, calming effect 20 min, user: adult, no adverse effects.
- Use small test populations — first users should be yourself or consenting adults with no allergies. Avoid sensitive populations (pregnant, infants) until you have training or professional clearance.
- Join a community — local herbalist groups, online forums, or a weekend class. Peer feedback shortens the learning curve. For formal training options see herbalism training courses and accredited programs.
- Take short courses — a weekend or online course on materia medica and safety is worth the investment. If you plan professional practice, review naturopathy certification requirements in Canada or equivalent local pathways.
- Set a budget and scale gradually — starter kit initial spend: low-budget AUD $80–$150 (basic tools + small herb selection). Higher-quality glassware and a scale can raise cost to AUD $200–$350. Prioritise a scale, amber bottles and a mortar and pestle first.
- Practice labels and SOPs — create a simple Standard Operating Procedure for each preparation (step-by-step with timings and temperatures). This builds reproducibility.
- Use evidence-based references — consult herb monographs and peer-reviewed literature for dosage and constituents; online databases and professional guild resources are helpful.
- Start a “learning project” — commit to making, documenting and reviewing one remedy per week for 8 weeks; this structured practice is how confidence forms.
- Expand responsibly — after mastering the basics, add 1–2 new herbs per month and a new method (e.g., glycerites or syrups).
- Use reliable resources — when researching active constituents or clinical data, consult peer-reviewed journals or credible databases such as PubMed or professional guilds like the American Herbalists Guild.
For practical symptom-focused strategies complementing your kit learning, see natural ways to relieve common symptoms.
Common mistakes and how to avoid them
I once made a large batch tincture using fresh herb without accounting for water content and ended up with a diluted final concentrate; solution: always use weight-based ratios and adjust for fresh herb moisture (fresh herb typically requires higher solvent volume). I’ve also stored infused oil in clear glass and saw it go rancid quickly; solution: use amber bottles and refrigerate oils.
Compact checklist — verify before calling your work complete
- All jars labelled with herb, ratio, date and user instructions.
- Three test remedies completed and logged (infusion, tincture, salve).
- All tools cleaned and stored in a dry, dark place.
- Safety log created (allergy patch tests performed and recorded).
- Local supplier and a backup online supplier identified for reorders.
When to call in a professional
Seek a qualified naturopath, herbalist or pharmacist if you or someone using a remedy has chronic illness, is pregnant, breastfeeding, on prescription medication, or experiences an unexpected reaction. For scope and prescribing details reference naturopathic medication prescribing laws.
Where to Continue Learning
Expand via books, local workshops and formal courses. Consider accredited modules in clinical herbalism or materia medica for deeper training. For course options and professional pathways see herbalism training courses and follow professional organisations for continuing education.
Final transition to wrap-up below.
Final takeaways
Assemble a small, functional kit: a mortar and pestle, accurate scale, amber glass, mesh strainers, a few carrier oils and 6–10 gentle herbs. Start with three repeatable recipes, document everything, and follow clear safety rules. This approach converts curiosity into a safe home practice.
Ready to build your kit? Start by ordering the scale, amber bottles and 25–50 g packets of chamomile, peppermint and calendula—then make your first infusion this weekend.