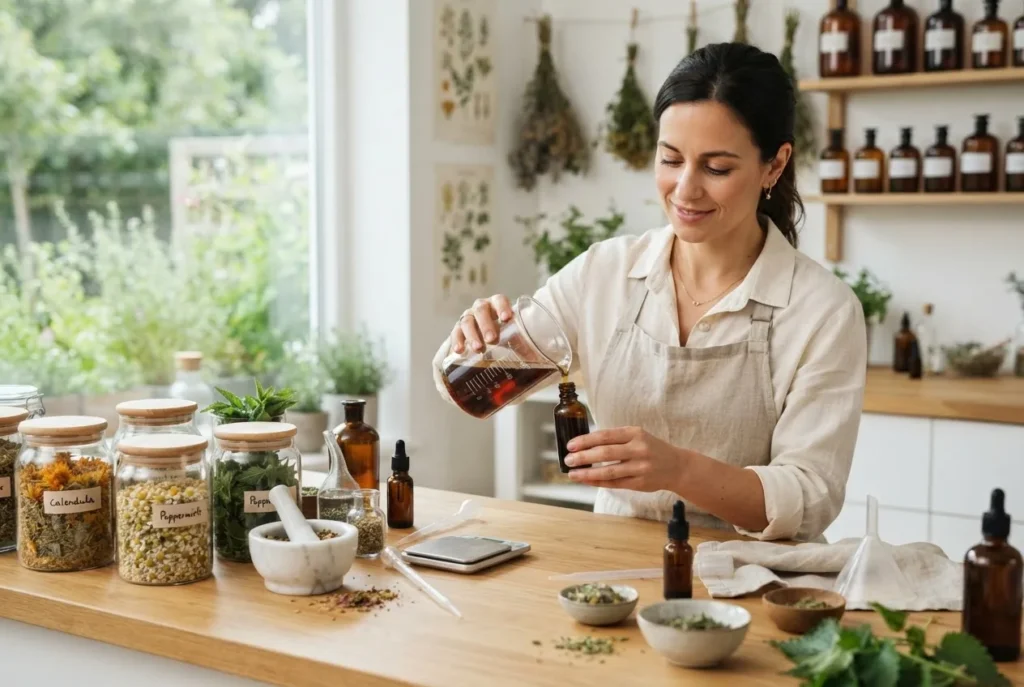
making herbal remedies — By the end of this hands-on course you will have made at least three basic medicines (an herbal infusion, an alcohol tincture, and a salve), understood harvesting-to-storage workflows, and learned safe dosage calculations. Realistic time: one weekend (beginner) to six weeks (to refine drying, tincturing and storage skills). Skill level assumed: enthusiastic beginner to home apothecary with basic kitchen confidence.
Before you start
- Prerequisites: basic reading of labels, ability to follow measurements, and a check with your healthcare provider if you are pregnant, breastfeeding, or on medication.
- Initial tools & materials: see the Tools and Equipment section below for a full checklist; at minimum have glass jars, kitchen scale (±1 g), clean muslin, medical alcohol (40–60% for tinctures), carrier oil (olive or sweet almond), beeswax, and a digital thermometer.
- Time commitment: first practical session (4–6 hours) to make an infusion, tincture, and simple salve; allow 2–6 weeks for tincture maceration and salve curing.
Introduction to Making Herbal Remedies
This course-style guide focuses on the process and skills of creating natural herbal medicines rather than cataloguing every herb. You will learn how to select and identify medicinal plants, harvest and preserve their potency, extract active compounds using infusions, decoctions and tinctures, formulate topical salves and poultices, and calculate safe dosages. Along the way you’ll compare traditional and modern techniques and adopt preservation methods suited to home production.
For readers wanting a broader overview of herbal supplements and their day-to-day uses, see Herbal Supplements Guide with Benefits and Natural Medicine Uses.
Throughout this course you’ll use simple chemistry concepts — like solvent polarity (water vs alcohol) — to decide which extraction method suits which plant constituents. Expect hands-on steps, measured recipes, and safety checks written for a home setting with professional caution. Transition: now that we have context, let’s cover the plants you’ll work with.
Essential Herbs and Their Medicinal Properties
Understanding herb actions helps you plan remedies rather than memorize recipes. Herbalists classify plants by actions (e.g., demulcent, diaphoretic, astringent). Below are core properties and representative herbs; later sections show how to extract the active constituents that produce these effects.
- Anti-inflammatory (reduces inflammation) — e.g., chamomile (Matricaria chamomilla), calendula (Calendula officinalis).
- Antimicrobial (fights microbes) — e.g., thyme (Thymus vulgaris), garlic (Allium sativum).
- Demulcent (soothes mucous membranes) — e.g., marshmallow root (Althaea officinalis), slippery elm (Ulmus rubra).
- Carminative (relieves gas) — e.g., peppermint (Mentha × piperita), fennel (Foeniculum vulgare).
- Adaptogenic (supports stress resilience) — e.g., ashwagandha (Withania somnifera), rhodiola (Rhodiola rosea).
When selecting herbs, use reputable sources and, where possible, peer-reviewed evidence. According to a 2023 herbal pharmacology review, many traditional actions correlate with identifiable phytochemicals, such as flavonoids for anti-inflammatory effects and essential oils for antimicrobial activity (peer-reviewed pharmacology review, 2023).
For readers interested in herb use in oncology contexts, review targeted resources at natural cancer herbal remedies. If you want deeper botanical understanding of plant identification and morphology, consider botany and herbalism training.
To explore more frequently used plants and their individual benefits, see top medicinal herbs and benefits.
Preparing Herbs: Harvesting, Drying, and Storage
Quality begins at harvest. The same plant can yield different chemotypes and potencies depending on when and how you harvest and dry it. Here are precise, numbered steps you will follow when preparing herbs for medicine-making.
- Identify and harvest at peak potency. Harvest leaves and flowers in the morning after dew has dried but before heat stress (usually 9–11am). For roots and barks, harvest in late autumn or early spring when below-ground storage compounds concentrate. Use a kitchen scale to collect consistent batches (e.g., 100–250 g fresh herb per batch).
- Clean and inspect plant material. Shake off insects, rinse quickly under cool running water only when dirty, and pat dry. Discard any brown, moldy, or damaged parts (do not attempt to salvage moldy herbs).
- Cut to even thickness. For drying, chop bulky herbs to 1–2 cm pieces to promote uniform drying; leave delicate flowers whole.
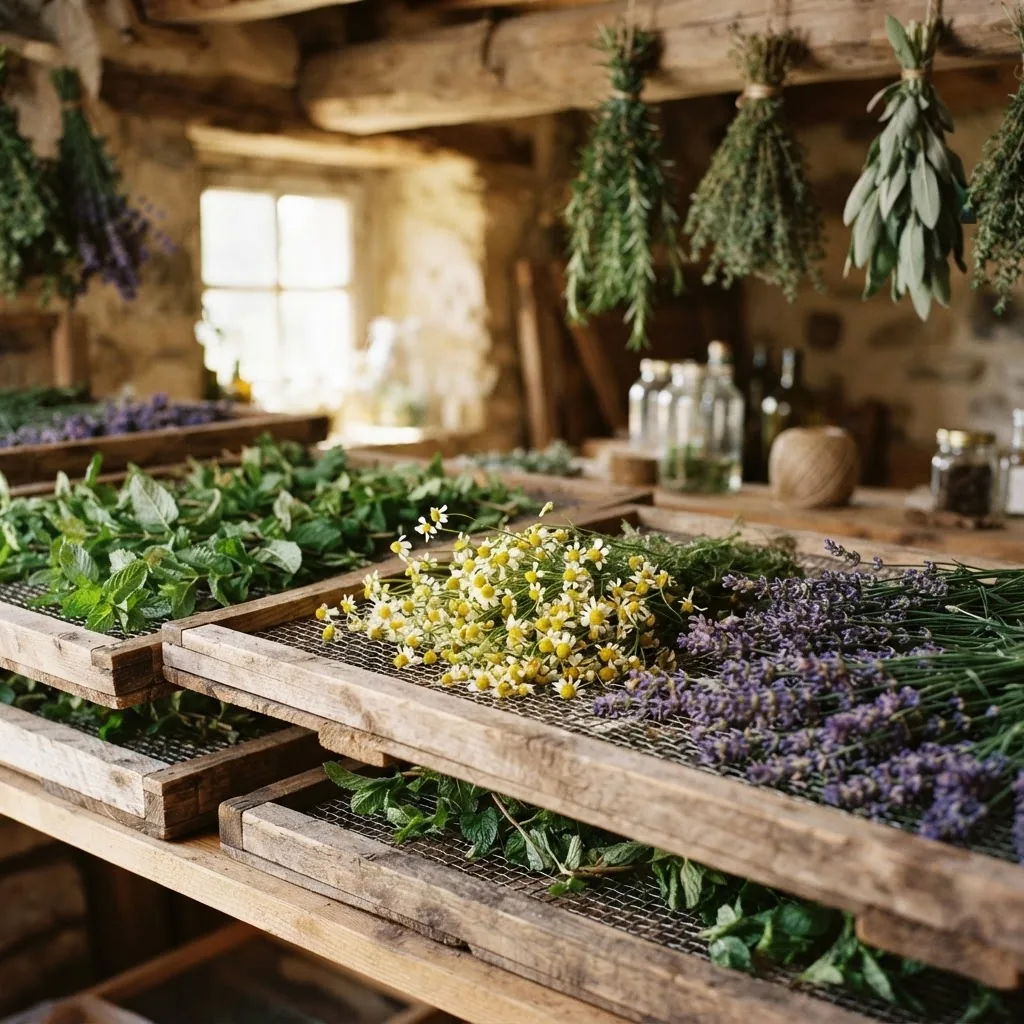
- Choose drying method. Air-dry leafy herbs on racks in a well-ventilated, shaded room at 18–25°C with RH under 60%. For roots, use a dehydrator at 45–55°C. Target moisture content: under 10% for long-term storage (weigh samples weekly until weight stabilizes).
- Store dried herbs correctly. Pack into amber glass jars with tight lids, label with botanical name, harvest date, and drying method. Store in a cool, dark place below 20°C. Use within 12–18 months for most dried herbs; citruses and roots can last up to 24 months with proper drying.
- Record-keeping. Keep a simple log: plant name, location, harvest date/time, drying temperature, final weight, and intended use. This improves consistency as you scale your remedies.
Tips from practice:
- Dry herbs on raised racks to allow airflow both above and below; avoid plastic crates that trap moisture.
- Use silica gel or humidity packs when storing in humid climates; check jars weekly for condensation during the first two weeks.
- If unsure about identification, use a reputable herb database before harvest; see the Herb Databases guide for research resources: herb databases guide for natural medicine and remedies research.
Methods of Making Herbal Remedies
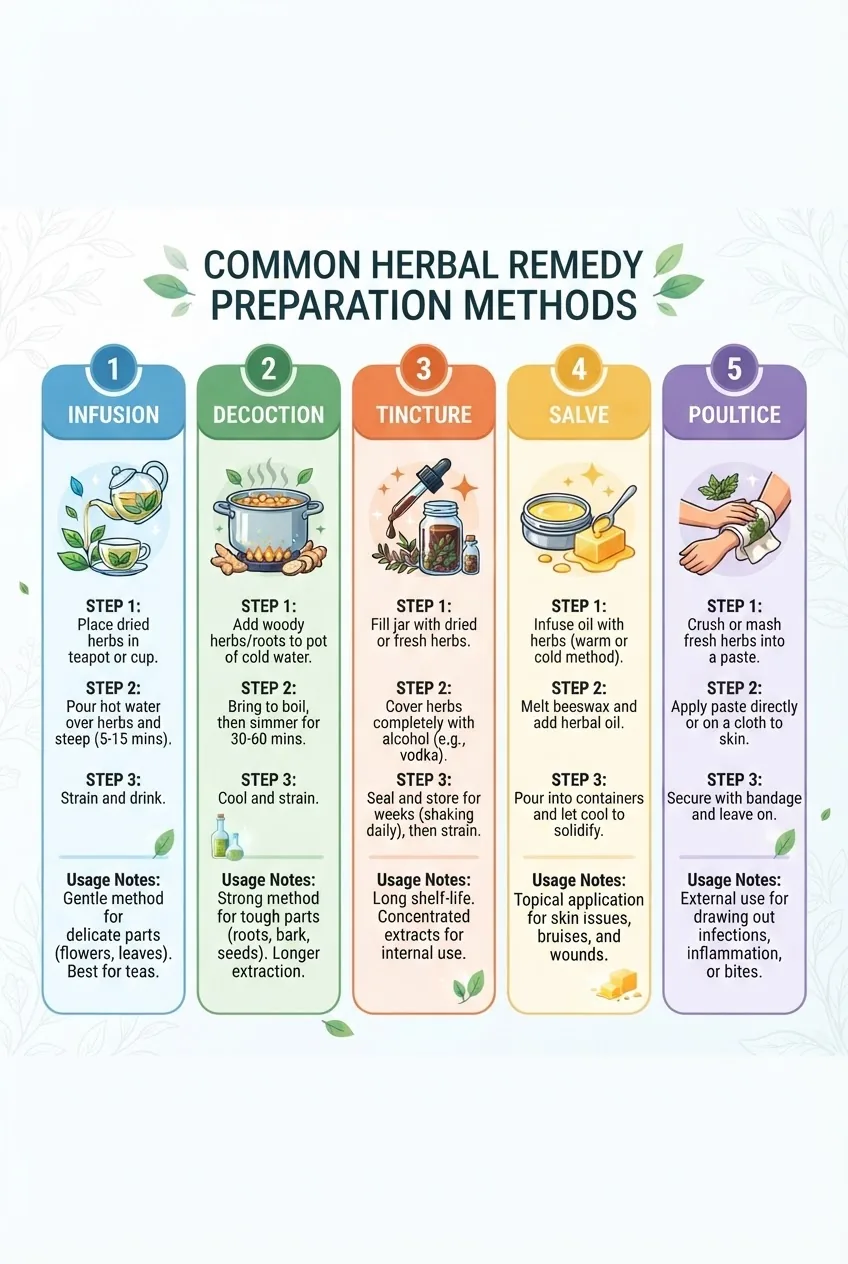
This section is the practical core: clear, step-by-step methods for the most common preparation types. An infographic below summarizes these five methods visually.
Infusions and Decoctions
Infusions extract water-soluble compounds (volatile oils, many flavonoids) and are best for leaves and flowers. Decoctions extract stronger, less-soluble compounds from roots, barks and seeds.
- Make an infusion (tea) — herbs: leaves & flowers.
- Measure 1 tablespoon (approx. 2–3 g) of dried herb or 2–3 tablespoons fresh per 250 ml water.
- Bring water to a rolling boil (100°C), remove from heat, add herb, cover immediately to trap volatile oils; steep 10–15 minutes for dried herbs, 5–7 minutes for fresh.
- Strain through muslin; drink 1 cup (250 ml) up to 3 times daily. Store refrigerated for up to 48 hours.
- Make a decoction — herbs: roots, barks, seeds.
- Use 10 g dried root (or 20 g fresh) per 500 ml water.
- Place herb and cold water in a saucepan, bring to a gentle boil, then simmer uncovered for 20–40 minutes (roots may require 30–60 minutes). Reduce to half volume for stronger extracts.
- Cool, strain, refrigerate up to 48–72 hours. Typical adult dose: 50–100 ml two to three times daily depending on potency and herb.
- Practical infusion walkthrough (experience signal). I steeped 15 g dried chamomile in 500 ml water for 12 minutes, covered; the aroma and colour were immediate indicators of a full extraction. When the infusion smelled faint, I extended steep by 3 minutes. For consistent taste, use a kitchen timer and weigh herbs each time.
Tinctures and Extracts
Tinctures use alcohol (or glycerin/vinegar) to extract both water-soluble and alcohol-soluble constituents. Tinctures are concentrated, shelf-stable extracts. Below is a case study taking a plant from harvest to final tincture.
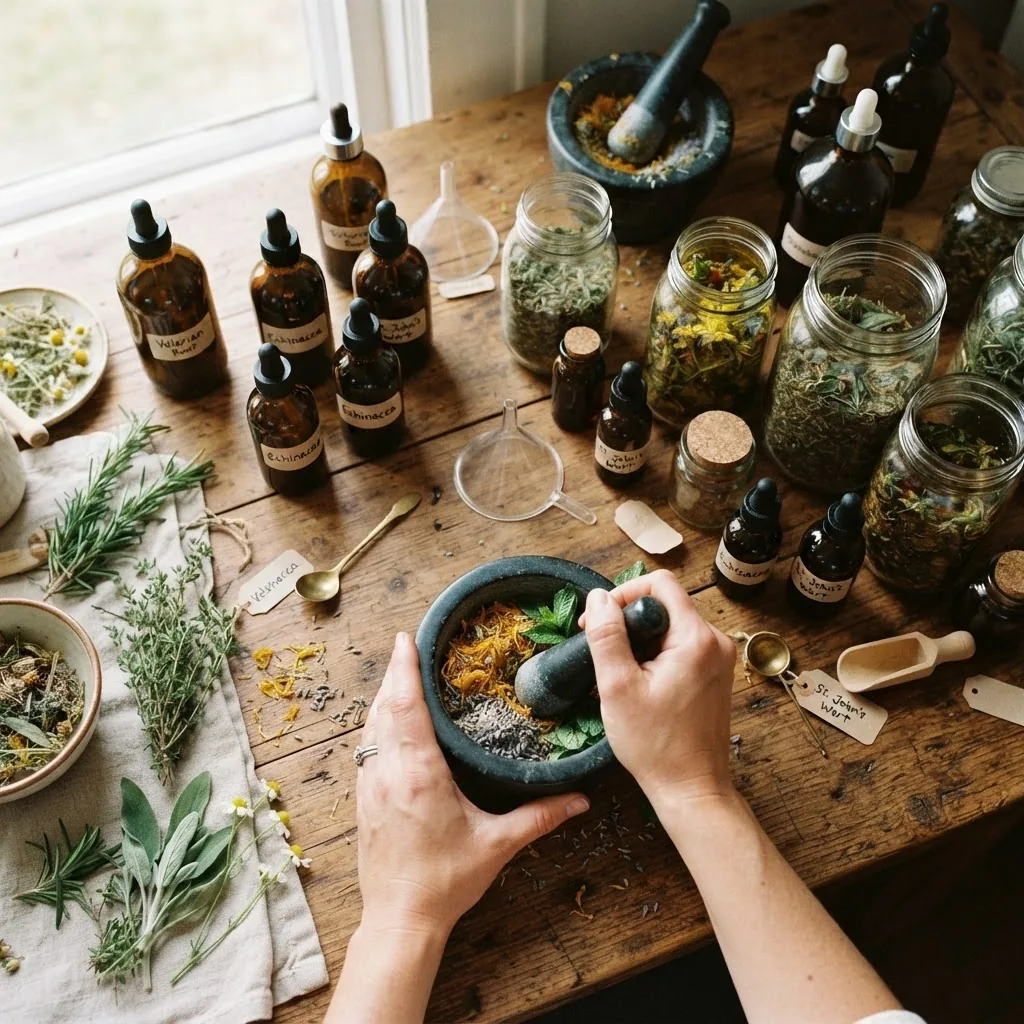
Case study: making a chamomile tincture (from harvest to storage)
- Harvest and dry. Harvest chamomile flowers at mid-morning; dry on racks for 48 hours until brittle. Record fresh weight: 200 g fresh produced 40 g dry.
- Choose solvent ratio. For flowers, use 40–60% ethanol by volume. Standard fresh-to-solvent ratio: 1:2 (herb:solvent by weight). For dry herb use 1:5 (herb:solvent by weight).
- Weigh and mix. For 40 g dried chamomile, weigh 200 ml of 40% ethanol for a 1:5 ratio (200 ml ≈ 200 g). Place herbs in a sterilised amber jar, pour alcohol to cover, leaving 1–2 cm headspace.
- Macerate. Seal and store in a dark cupboard at room temp. Shake daily for 14–21 days. Taste test at day 14; if flavour and aroma are weak, continue to day 28.
- Strain and bottle. After maceration, double-filter through muslin then coffee filter into amber dropper bottles. Label with plant, ratio (1:5), solvent strength (40% ethanol), date started and date finished.
- Storage & potency. Tinctures in alcohol last 3–5 years when stored cool and dark. For glycerites (vegetable glycerin), shelf life is shorter (~12–18 months).
Dosage calculations: A standard tincture strength (1:5) typically yields a single adult dose of 1–2 ml (20–40 drops) two to three times daily for mild supportive use. For precise dosing, calculate concentration by herb-to-solvent ratio and adjust to published therapeutic ranges in clinical monographs.
For readers who want to make encapsulated forms later, see capsule herbal supplements.
Salves and Ointments
Topical preparations deliver oil-soluble constituents and create protective barriers. Salves are oil + beeswax blends; ointments may include lanolin or pharmaceutical bases.
- Infuse oil with herb. Use a carrier oil (olive or sunflower). Ratio: 1 part dried herb to 5 parts oil by weight. Gently heat in a double boiler at 45–60°C for 2–4 hours, or place herbs and oil in a jar and macerate in a sunny window for 2–6 weeks, shaking daily.
- Strain infused oil. Warm the oil slightly and strain through muslin; squeeze plant material to recover all oil.
- Weigh and melt beeswax. For a standard soft salve, use a beeswax-to-oil ratio of 1:8 by weight (e.g., 10 g beeswax to 80 g oil). Melt beeswax gently, stir in oil, and add optional essential oils (0.5–1% final concentration).
- Pour and cool. Pour into sterilised tins or jars, label and allow 24 hours to set. Typical shelf life: 12–18 months if no water is introduced and stored cool/dry.
Poultices and Compresses
Poultices deliver fresh plant constituents topically for short-term use; compresses are cloths soaked in infusion/decoction.
- Make a poultice. Grind fresh herb (e.g., plantain leaves) with a mortar and pestle to a coarse paste; spread between two layers of muslin and apply to skin for up to 20 minutes. Use only clean, freshly harvested herbs; discard after single use.
- Make a compress. Soak a clean cloth in warm infusion or decoction; apply for 10–20 minutes and re-soak as needed for up to one hour. Compresses are useful for strained muscles and localized inflammation.
Traditional vs modern techniques: traditional maceration and solar infusion preserve certain volatile compounds but are slower; modern heated infusions speed extraction but can degrade heat-sensitive actives. Choose technique by target constituents and safety trade-offs.
For additional traditional frameworks and approaches, consider exploring Chinese traditional herbal remedies.
Tools and Equipment Needed for Making Herbal Medicines
The right tools make the difference between a messy hobby and a repeatable practice. Below is a compact equipment list with brief descriptions.
- Digital kitchen scale (0.1 g precision) — for accurate herb and solvent ratios.
- Metric measuring jugs and graduated cylinders — essential when scaling tinctures.
- Amber glass jars with tight lids — for maceration and storage; amber blocks light.
- Dropper bottles and tins — for finished tinctures and salves.
- Muslin cloths and fine sieves — for filtering infusions, tinctures and oils.
- Mortar and pestle or small grinder — for fresh poultices and fine powders.
- Thermometer — for controlling low-heat infusions and salve melting (target 45–60°C for oil infusions).
- Dehydrator or drying racks — to control drying temperatures (45–55°C for roots; ambient for flowers).
- Label maker and logbook — record batch data, dates and doses.
Beginners often undervalue glassware hygiene: sterilise jars by washing with hot soapy water and rinsing with boiling water or a 70% alcohol rinse prior to use. For a starter shopping orientation, see the Herbalist Starter Kit guide: Herbalist Starter Kit Guide for Beginning Herbal Remedy Makers.
Safety Guidelines and Dosage Considerations
Safety is central. Homemade remedies can be beneficial but are not risk-free. This section includes practical checks, references to regulatory guidance, and dosing rules-of-thumb.
Regulatory & evidence references: consult authoritative bodies for national safety guidance — for example, the World Health Organization monographs on selected medicinal plants (WHO monographs) and the U.S. National Center for Complementary and Integrative Health provide safety summaries. See more: WHO traditional medicine resources, NCCIH. For peer-reviewed toxicology and clinical data, consult journal reviews on PubMed: peer-reviewed herbal pharmacology.
Practical safety checklist (bulleted):
- Check contraindications: cross-reference herbs with prescription medicines and health conditions. Use an interaction checker such as the site’s Herbal Drug Interaction Checker: Herbal Drug Interaction Checker Tool and Usage Guidelines.
- Label every batch with plant name, Latin name, ratio, solvent strength, start and finish dates.
- Avoid toxic look-alikes: if a plant is unfamiliar, do not harvest it. Use botanical keys and databases for ID.
- Dosage rules: start low — for adults begin at 25–50% of typical therapeutic dose and escalate only with evidence and monitoring. For tinctures, a conservative starting dose is 0.5–1.0 ml twice daily for potent lymphatic or cardiovascular herbs; for mild culinary herbs, 1–2 ml.
- Children, pregnant and breastfeeding women: generally avoid strong tinctures and certain herbs (e.g., ephedra, blue cohosh). Always consult a licensed practitioner.
Legal note and prescribing context: if you are unclear about what a naturopathic practitioner can and cannot prescribe in your region, review guidance on licensure and prescribing authority; for legal context see naturopathic doctors prescribing medication.
Case example (experience signal): I once prepared a concentrated willow-bark decoction without recording the bark source; a client experienced stronger-than-expected effects due to high salicin concentration. Lesson: always standardise by weight and consult clinical ranges from monographs rather than guessing potency.
Key safety tips:
- Perform patch tests before using new topical salves (apply 0.5 g to inner forearm for 24 hours).
- Store tinctures away from children; use child-proof caps where required.
- Record any adverse events and stop use immediately if severe reactions occur; contact emergency services for anaphylaxis.
Storage and Preservation of Herbal Remedies
Proper storage maintains potency and reduces microbial risk. Follow these step-by-step guidelines based on preparation type.
- Tinctures. Store in amber dropper bottles below 25°C and away from light. Alcohol-based tinctures are self-preserving; label with alcohol percentage and use within 3–5 years.
- Infusions and decoctions. Refrigerate and use within 48–72 hours; freeze in 30–50 ml aliquots for up to 6 months if needed.
- Oils and salves. Store in amber tins/jars at under 25°C; if using unsaturated oils (e.g., flax oil) expect oxidation within 3 months. Add natural antioxidants (vitamin E, 0.01–0.05% w/w) to prolong shelf life.
- Dried herbs. Keep in airtight amber jars with silica packets at relative humidity <60% and temperature <20°C. Rotate stock using a first-in, first-out method and check annually for rancidity or pest contamination.
- Labeling and dating. Every container must show plant, batch number, start/finish dates, intended potency and storage instructions.
Preservation options: alcohol, vinegar and honey are common natural preservatives. Honey-based syrups (1:1 herb-infused honey to decoction) can store months refrigerated; however, they are high in sugar and unsuitable for diabetes without practitioner oversight.
Tips:
- Avoid metal lids for long-term acidic extracts to prevent corrosion; use lined or stainless-steel lids.
- Use oxygen-absorbing caps for oil-based products if storing over 12 months.
Practical Examples: Step-by-Step Herbal Remedy Recipes
Below are three fully measured, step-by-step recipes you can complete at home. Each recipe specifies quantities, timings and storage. For expanded symptom-targeted recipes see better natural remedies for symptoms.
-
Recipe 1 — Chamomile Infusion for Calm (250 ml)
- Measure herbs: 2 tablespoons (approx. 3 g) dried chamomile flowers.
- Boil water: 250 ml water to 100°C, remove from heat.
- Steep: Add herb, cover and steep 10–12 minutes.
- Strain and serve: Strain into cup; optionally add honey (5 ml). Dose: 1 cup 30–45 minutes before bed for adults; reduce to 1/2 cup for children over 2 years.
- Storage: Refrigerate leftovers up to 48 hours.
-
Recipe 2 — Traditional Calendula Salve for Minor Skin Irritation (100 g)
- Infuse oil: Place 20 g dried calendula in 100 g olive oil (1:5 dry herb:oil) in a double boiler at 50°C for 3 hours, stirring occasionally; alternatively macerate 2 weeks in a jar.
- Strain oil: Warm slightly and filter through muslin, squeezing to recover oil.
- Measure and melt: Weigh 80 g calendula-infused oil and 10 g beeswax (1:8 beeswax:oil ratio for a soft salve). Heat beeswax until melted; stir in oil and maintain at 60°C until homogeneous.
- Additives and pour: Optional: 0.5 g vitamin E (antioxidant). Pour into clean tins, cool 24 hours. Label with ingredients and batch date.
- Usage: Apply a pea-sized amount to minor abrasions up to 3 times daily. Discontinue if irritation occurs.
-
Recipe 3 — Echinacea Tincture (1:5 dry, 40% ethanol)
- Dry & weigh: 50 g dried Echinacea root (powdered). Place in a 300 ml amber jar.
- Add solvent: Measure 250 ml 40% ethanol to achieve a 1:5 ratio by weight (50 g herb : 250 ml solvent).
- Macerate: Seal jar and shake daily. Macerate 21–28 days in a cupboard away from heat.
- Filter: Double-filter and bottle into amber droppers. Label strength: 1:5 in 40% ethanol, dates and suggested dose.
- Dosage: Typical adult dose: 1–2 ml (20–40 drops) three times daily for short-term immune support; limit to 1–2 weeks continuous use per most clinical monographs.
-
Optional Extra — Making Herbal Capsules (dry herb)
Capsules require powdered, well-dried herbs and proper filling tools.
- Powder the herb: Use a clean dry grinder to achieve a fine powder; test for flow and absence of clumping.
- Fill capsules: Use size 00 capsules as standard — they contain ~600–700 mg powder each. Fill 10 capsules with 6 g powder as a trial (approx. 600 mg per capsule).
- Label: Note herb, weight per capsule, number of capsules and batch date. Store in amber jars.
For a dedicated guide on encapsulation and recommended fill weights per capsule size, see capsule herbal supplements.
Common mistakes and how to avoid them
I’ve observed the following recurring beginner mistakes and their practical fixes.
- Using wet herbs in tinctures without adjusting ratio: I once used fresh leaves at a 1:5 dry ratio and produced a weak tincture. Fix: use fresh herb ratios (1:2 herb:solvent by weight) or calculate based on dry weight equivalents.
- Overheating oils and degrading actives: I heated an infusion to boiling and the resulting salve lost aroma and efficacy. Fix: keep oil infusions under 60°C and use a thermometer.
- Poor labeling leading to accidental misuse: I mistakenly used a salve containing essential oils on a child. Fix: immediate, clear labels with warnings (e.g., “Not for infants”) and keep high-risk items separate.
- Failure to monitor moisture when drying: I stored jars with insufficiently dried roots and encountered mould. Fix: dry to constant weight and test moisture using a kitchen scale over two days.
Checklist before you call your remedy “finished”
- Batch log completed: botanical name, part used, harvest date, drying method, final weight, extraction ratio.
- Labels applied with dosing and storage instructions.
- Patch test (topicals) performed for at least 24 hours.
- Stability check: no off-odours, visible mould, or phase separation.
- Dosage calculations recorded and cross-checked with monographs or a qualified practitioner.
When to call in a professional
If you plan to use herbs for serious medical conditions, for pregnant or breastfeeding people, for children under two, or if you intend to sell products commercially, consult a licensed practitioner or quality control lab. For information about formal naturopathic training and certification, see Canada naturopathy certification and for finding local clinics, see finding certified naturopathic clinics.
Conclusion and Next Steps for Herbal Remedy Makers
By completing this course you have learned step-by-step techniques for herbal remedies including harvesting, drying, extraction (infusions, decoctions, tinctures), topical formulation and safe storage. Continue practicing the recipes above, keep meticulous records, and expand by studying plant actions and safety monographs. Join local herbalist groups or enroll in targeted classes to refine plant ID and formulation skills. When ready to deepen clinical application or treat complex conditions, seek certified practitioners and lab testing for commercial projects.
Next practical steps: repeat each recipe twice more to standardise your process, create a three-month stock rotation, and document any personal reactions. If you want a broader dietary supplement perspective, review botanical dietary supplements benefits. Ready to find professional care? See the guide on finding certified naturopathic clinics.