

Back acupuncture points: by the end of this hands-on guide you will have a printable chart, a practical acupressure routine for lower back ache, and a clear plan for safe needle-based acupuncture referrals. Expect 45–90 minutes of focused practice; skill level: beginner to confident self-treater.
Before you start
- Prerequisite: basic health check — ensure no open wounds, infection, acute fractures or unstable medical conditions.
- Tools and materials: a printed back acupuncture points chart (download link below), a massage oil or lotion, clean towels, a mirror or partner, a soft pillow for support, a timer, and a notebook to log sessions.
- Optional professional supplies: single-use acupuncture needles (only for trained practitioners), gloves, alcohol swabs, and a sharps container.
- Environment: quiet room, comfortable table or bed, ambient temperature 20–24°C, good lighting.
- Time allocation: 20 minutes for mapping and palpation, 15–30 minutes per treatment session, 10 minutes for aftercare and notes.
Overview of Back Acupuncture Points
This section gives a precise, practical orientation to the major back meridians and pressure locations used in routine therapy for back pain. Read it closely so you can match the printable chart to palpable anatomy when you begin palpation and stimulation.
Back acupuncture points are locations along the skin overlying muscles, connective tissue and meridians that Traditional Chinese Medicine (TCM) uses to influence pain, muscle tension and energy flow (Qi). The two dominant meridian systems for the back are the Bladder Meridian and the Du Meridian (Governing Vessel). The Bladder Meridian runs bilaterally from the neck down the back and interconnects many Jia Ji points (paraspinal points adjacent to each vertebra), while the Du Meridian follows the midline over the spine.
Key clinical uses of back points include pain relief, muscle tension release, improved mobility, and autonomic regulation (reducing sympathetic overactivity that perpetuates chronic pain). For simple analogies: imagine the Bladder Meridian as two tracks that run either side of the spinal fence, and the Du Meridian as the gatekeeper running along the fence post; stimulating either can calm traffic jams of tension and pain.
- Back meridians: Bladder (BL) paired tracks and Du (Governing Vessel) midline.
- Key acupuncture points: Jia Ji points (paraspinal), BL23 (Shenshu), BL25 (Dachangshu), BL40, DU4 (Mingmen), DU14 and DU3.
- TCM back anatomy: points correspond to paraspinal muscles (erector spinae, multifidus), thoracolumbar fascia and facet joint regions.
- Energy flow back: Qi movement along meridians often reflects muscular tightness and referred pain patterns.
- Back pain relief points: targeted selection varies with location: lumbar, thoracic, or upper back/neck.
Transition: Now that you understand the meridian map and clinical rationale, the next section provides a downloadable chart and a visual infographic to use while you palpate and treat.
Detailed Back Acupuncture Points Chart Download
This downloadable resource is made for hands-on use: a clear, rear-view back map marking major Bladder Meridian points, the Du Meridian, Jia Ji pairs, and useful pressure point groupings for lumbar, thoracic and upper back pain. The chart is printable at A4 and includes a short legend describing each point’s common clinical indication and precise anatomical landmarks.
Download instructions: open the PDF, print in portrait A4, and place the page beside your treatment area. Use the legend to locate points relative to spinous processes and paraspinal muscles. For mobile viewing, zoom to 200% for clear point labels.
Get the chart now:
Transition: With the chart printed, we move into a clinician-grade list of the specific back acupuncture points, their locations and how each is used therapeutically.
Key Acupuncture Points on the Back and Their Functions
This section lists the essential treatment points used in most back pain protocols. Each entry gives: anatomical location (how to find it by palpation), TCM indication, and a short practical therapy note for pressure point stimulation or needling if you are a trained practitioner.
-
1. Jia Ji points (Paraspinal extra points) — location and use
Location: bilateral points 0.5–1 cun lateral to the lower border of each thoracic and lumbar spinous process (T1–L5). These are palpable as tender spots along the paraspinal muscles adjacent to each vertebra.
Function: local pain relief, segmental nerve modulation, muscle tension release. In TCM they are used for regional disorders reflecting the affected spinal segment (e.g., lumbar Jia Ji for lower back ache).
Therapy note: apply direct pressure for 30–90 seconds or needle perpendicularly (0.5–1.5 cun) depending on body region and practitioner training. For self-care, thumb pressure with slow circular motion is effective.
-
2. BL23 (Shenshu) — kidney association for lumbar problems
Location: 1.5 cun lateral to the lower border of the spinous process of L2.
Function: commonly used in lumbar pain associated with TCM-diagnosed kidney deficiency and chronic low back ache. It helps strengthen the lumbar region and relieve deep ache.
Therapy note: effective for chronic lower back ache; press for 60 seconds then release. Trained acupuncturists often use needles 1–1.5 cun obliquely toward the spine.
-
3. BL25 (Dachangshu) — lumbar spine and bowel connection
Location: 1.5 cun lateral to the lower border of the spinous process of L4.
Function: used for local lumbar pain and sacroiliac issues; assists when back pain is accompanied by bowel irregularities per TCM patterning.
Therapy note: palpate for a tight band; apply sustained pressure and gentle kneading for 1–2 minutes to reduce local muscle guarding.
-
4. DU4 (Mingmen) — midline lumbar tonic point
Location: on the midline of the lower back, in the depression below the spinous process of L2.
Function: boosts lumbar Yang and supports chronic lumbar weakness; used in both acupuncture therapy and acupressure.
Therapy note: apply moderate pressure for 30–45 seconds. Avoid strong needling in acute infection or pregnancy without qualified supervision.
-
5. DU3, DU14 — midline spine regulators
Location: DU3 is below L4 spinous process; DU14 is below C7. Both are midline.
Function: DU3 supports lumbar mobility; DU14 is used for upper back and neck tension, clearing heat in the upper body.
Therapy note: DU points are powerful regulators of the Du Meridian (Governing Vessel); use gentle sustained pressure and combine with adjacent Jia Ji stimulation for segmental effect.
-
6. BL40 (Weizhong) — lower back and posterior knee connection
Location: midpoint at the back of the knee, in the popliteal crease.
Function: BL40 is used for lower back pain, particularly when pain radiates down the leg or when hamstring and gluteal tension contribute to lumbar symptoms.
Therapy note: pressing BL40 can produce immediate relaxation downstream; apply 30–60 seconds of pressure, then reassess lumbar mobility.
-
7. BL52 (Zhishi) — support point for chronic lumbar weakness
Location: 3 cun lateral to the midline at the level of the second lumbar vertebra.
Function: used in chronic degenerative low back conditions; strengthens local tissues and reduces deep aching pain.
Therapy note: combined with BL23 for chronic cases; treat with gentle pressure and heat application for 5–10 minutes if tolerated.
-
8. Paraspinal near-facet points — local joint-related pain targets
Location: tender spots on the paraspinal region lateral to the spinous processes over a facet joint.
Function: relieve mechanical facet pain, stiff segments and referred myofascial pain.
Therapy note: use local friction, trigger-point release techniques, and targeted pressure for 30–120 seconds. Do not aggressively compress if there is radicular pain with neurological signs.
-
9. Extra points for referred pain: Ashi and local muscle knots
Location: variable; Ashi points are wherever pressure reproduces the patient’s pain.
Function: precise for tender points and trigger points creating referred back pain.
Therapy note: for self-care, sustained thumb pressure with small circular motion for 60–90 seconds often reduces local spasm and referred pain.
-
10. Integration with anatomy: muscle and meridian relevance
Location mapping: interpret point locations relative to the erector spinae, multifidus and thoracolumbar fascia. Many back acupuncture points correspond to palpable muscle tightness and motor points; treat both meridian and musculoskeletal aspects for best results.
Therapy note: always confirm that a tender meridian point lines up with a muscular dysfunction — combined myofascial release and point stimulation is practical and highly effective.
Transition: With these points identified, the next section walks you through exactly how to perform acupressure and pressure point stimulation on the back step-by-step, including manual techniques and treatment timings.
Acupressure Techniques for the Back — Step-by-Step Guide
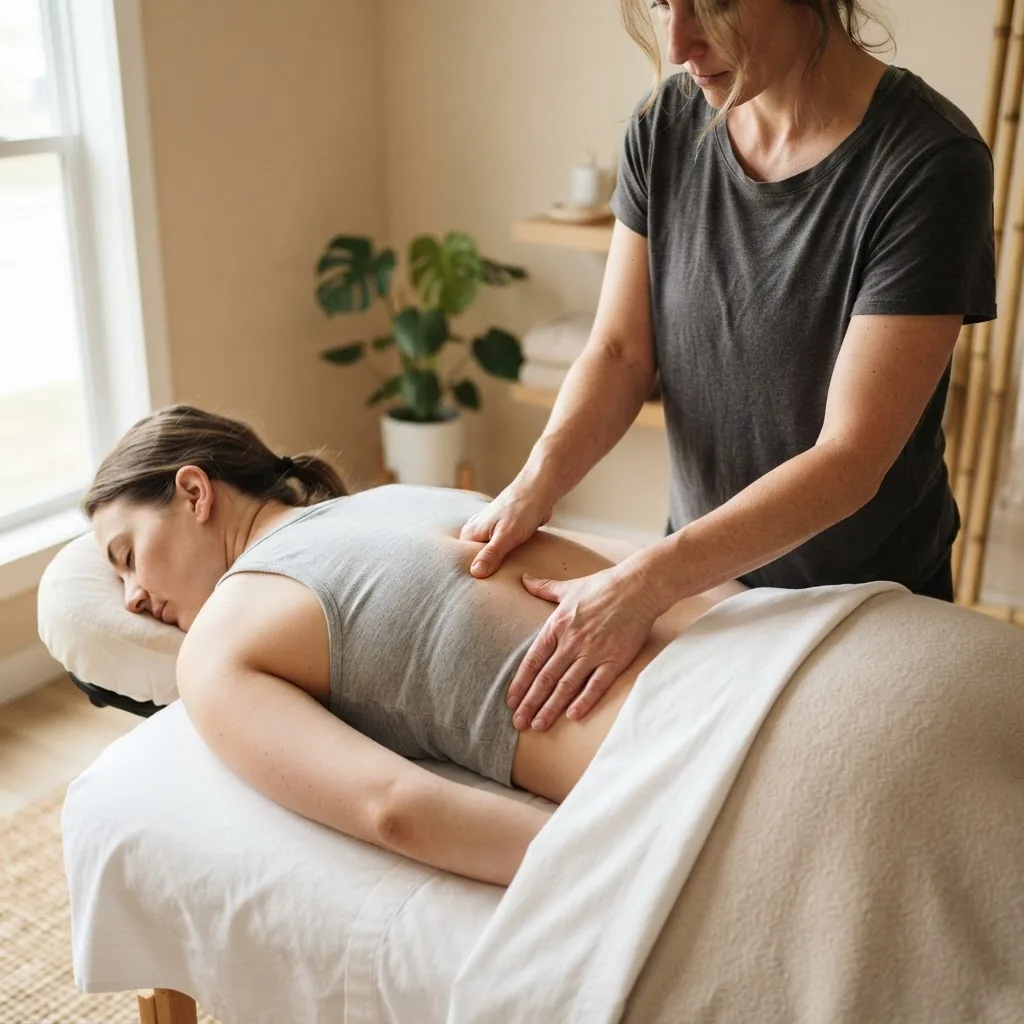
This hands-on section is written for someone preparing to treat themselves or a client. Each step starts with a bold action-first instruction and includes exact timings, pressure guidance (measured subjectively as light, firm, or deep), hand positioning, and safety cautions. For longer maneuvers you will see detailed subsections.
-
1. Map and mark the key points — 10–15 minutes
Use your printed chart and a washable skin marker. With the patient seated or prone, locate the midline spinous processes using gentle palpation. Identify L4 as the level of the iliac crests. Mark Jia Ji pairs for the troublesome segment(s), BL23 and BL25, and the Du midline points DU3–DU4. Confirm with the patient where tenderness reproduces their pain.
-
2. Warm and mobilise the tissues — 3–5 minutes
Apply light massage using oil or lotion. Use flat palm gliding strokes from the sacrum upward along the paraspinal muscles to mobilise superficial fascia. This reduces guard and prepares the tissues for point-specific pressure. Pressure level: light to moderate (roughly 2–4/10 on pain scale).
-
3. Palpate and confirm tender points — 5–7 minutes
Use your thumbs or index and middle fingers to press each Jia Ji point and adjacent BL points to find the most tender spots (Ashi). Ask the patient to rate tenderness on a 0–10 scale; target points that are 4–7 for effective feedback-driven treatment.
-
4. Apply sustained pressure to Jia Ji and BL points — 30–90 seconds per point
Technique: use thumbs with the distal phalanx or a knuckle for deeper pressure. Pressure intensity: firm but non-sharp (approx. 4–6/10). Maintain steady pressure for 30 seconds, then slowly release for 10 seconds; repeat 2–3 times. For each point, combine with small clockwise circular motion if tolerated.
Caution: avoid aggressive compression over acute inflammation, varicose veins, or undiagnosed masses.
-
5. Use cross-fibre friction for tight bands — 1–2 minutes per band
Technique: with the thumb pad or index finger, perform short, brisk cross-fibre strokes perpendicular to the aligned muscle fibers on the paraspinal muscles. Pressure: moderate-deep but never sharp. This reduces focal adhesions and improves local mobility.
-
6. Combine distal points for descending effect — 30–60 seconds each
Example: pressing BL40 at the back of the knee while treating the lumbar Jia Ji can reduce hamstring and gluteal tension that aggravates low back pain. Use BL40 with firm thumb pressure (3–6/10) for 30–60 seconds; reevaluate lumbar tension immediately after.
-
7. Use slow oscillating holds for the Du Meridian — 2–3 minutes total
Technique: place thumbs along the midline points DU3–DU4 and perform slow oscillating pressure synchronized with the patient’s breathing (inhale hold, exhale release). This pattern supports autonomic regulation and reduces sympathetically-mediated muscle tightness.
-
8. Apply trigger-point release to Ashi spots — 60–120 seconds per trigger
Technique: sustained, tolerable pressure (5–7/10) on the trigger point until pain intensity drops by at least 50% or for a maximum of 120 seconds. Follow with gentle stretching of the paraspinal muscles for 20–30 seconds to re-lengthen fibers.
-
9. Finish with soothing strokes and heat — 5–10 minutes
Use gentle effleurage and apply a warm pack (avoid direct heat on open skin) for 5–10 minutes to increase local circulation and support relaxation. Ask the patient to move slowly and note any changes in pain and range of motion.
-
10. Document and plan the next session — 5 minutes
Record points treated, patient responses (pain scale pre/post), techniques used, and any adverse response. Schedule a course of 4–8 sessions spaced 3–7 days apart for persistent issues; acute muscle strain may respond in 1–3 sessions.
Transition: if you want to expand your practice into abdominal or ankle acupressure, follow-up resources are recommended.
Abdominal Pain Acupressure Points Guide
Acupressure Points in Ankle Chart
Pressure Points for Neck Pain Therapy Guide
Cautions and tips: for pressure applications, start with lower intensity (2–3/10) and increase only if the patient tolerates it. Avoid deep pressure right over the spine or over recent surgery sites. For pregnant clients, avoid strong stimulation of sacral/lumbar points without professional guidance.
Transition: the next section focuses exclusively on acupressure point for lower back ache with specific self-care routines and safety checks.
Acupressure Points for Lower Back Ache Relief

Lower back ache is the most common presentation in community clinics. This section provides an exact 6-step self-treatment routine you can perform safely at home, including pressure durations, session frequency, and when to stop.
-
Step 1: Position and breathe — 2 minutes
Lie prone on a firm surface with a small pillow under the hips or sit upright with lumbar support. Breathe slowly at a 4-second inhale and 6-second exhale for two minutes to downregulate tension before touch.
-
Step 2: Locate L4 and mark — 3 minutes
Find the line of the iliac crests — the spinous process at this level is L4. Using the printed chart, mark the bilateral Jia Ji points adjacent to L4 and BL25. These are the primary targets for most lower back ache.
-
Step 3: Apply progressive pressure to Jia Ji — 3 sets of 45–60 seconds
Use thumbs or a rounded acupressure tool. Apply sustained pressure for 45–60 seconds; release for 15 seconds; repeat twice more. Pressure intensity: firm but non-radiating (approximately 5/10). If sharp or radiating pain occurs, ease off immediately.
-
Step 4: Stimulate BL23 and BL25 — 60 seconds each
Apply steady, moderate pressure for 60 seconds on each point. For chronic ache, follow with light heating (a warm pack or heat lamp at least 30 cm away) for 5 minutes to increase tissue pliability.
-
Step 5: Use distal supporting points — BL40 and gluteal trigger points, 30–60 seconds each
Press BL40 and then local gluteal trigger points with firm pressure for 30–60 seconds. Release and perform gentle hip flexor stretches for 20–30 seconds to reduce referral tension to the lumbar spine.
-
Step 6: Reassess and record — 5 minutes
Have the patient stand and bend forward slowly; note changes in pain intensity and range of motion. Record findings and any adverse response. For persistent or worsening pain, stop self-treatment and consult a practitioner.
Practical frequency: perform this routine once daily for acute strain for up to 5 days; for chronic low back ache, use every 48–72 hours and combine with professional assessment. If relief is partial (30–50% reduction) over 2–4 sessions, continue the program; if not, seek specialist review.
Experience note: I commonly observe quick reductions in superficial muscle guarding within 1–2 sessions; deeper structural or radicular pain typically requires professional acupuncture therapy and multimodal care.
Transition: safety is essential — read the following section carefully before you perform any needle-based acupuncture or firm-pressure interventions.
Safety, Precautions, and When to See a Professional
Safety is non-negotiable. Below are clear contraindications, practical precautions, and when to escalate care.
- Contraindications: do not perform deep needling or aggressive pressure if there is: active infection, fever, anticoagulant therapy without medical clearance, uncontrolled diabetes with neuropathy, recent spinal surgery (within 6 months), fractures, or malignant disease involving the spine.
- Pain red flags: new-onset severe night pain, progressive neurological loss (numbness, weakness, bowel/bladder changes), unexplained weight loss — seek urgent medical review.
- Needle safety: single-use sterile needles only, proper skin cleaning with alcohol if needles are used by licensed practitioners, and correct disposal in a sharps container.
- Self-care precautions: avoid deep sustained pressure over the spine; if you experience dizziness, faintness, or worsening radiating pain stop treatment immediately.
- Adverse effects: minor bruising, transient soreness, or mild fatigue are common; persistent worsening or signs of infection require medical attention.
- Regulatory guidance: follow national standards for acupuncture practice; NCCIH guidance and WHO documents provide safety recommendations.
Quick safety checklist:
| Check | Required |
|---|---|
| No red-flag signs | Yes |
| Sterile needles (if used) | Yes (practitioner only) |
| Patient informed consent | Yes |
Evidence and authority note: According to a 2023 peer-reviewed systematic review, acupuncture and acupressure show clinically meaningful reductions in chronic low back pain compared with usual care in several short-term trials. For safety standards, consult government health sources.
External resources: Cochrane Reviews on acupuncture and WHO clinical guidelines provide regulatory and efficacy summaries.
Transition: if you’re interested in formal training or expanding into professional practice, the final section lists recommended resources and next steps.
Additional Resources and Training for Back Acupuncture Therapy
If you want to progress from self-care to professional practice or deepen your clinical skills, here are recommended learning paths and reference resources. Training bridges TCM theory, anatomy, clinical safety and evidence-based practice.
For a comprehensive education pathway, consider the Acupuncture Acupuncturist Training and Certification Guide as your pillar resource for scope of practice, accredited courses and local registration requirements.
Recommended sibling reads to expand your study:
- 12 Meridians Chart PDF Guide
- Abdominal Pain Acupressure Points Guide
- Acupressure Knee Pain Points Training
- Acupressure Points in Ankle Chart
- Acupressure Practitioner Course and Certification Overview
- Top Benefits of Acupuncture Treatment Guide
Training pathways: start with a foundational accredited course covering TCM theory, meridian anatomy and point location, then progress to supervised clinical hours. For acupressure certification, a 40–120 hour course plus supervised practice is typical depending on jurisdiction.
Transition to practice tip: always pair point work with patient outcome measures and clear documentation — this supports safe, effective treatment and prepares you for continuing professional development.
Hands-On Steps Summary (Practical Checklist)
- Print the chart and mark L4 as your anatomical anchor.
- Warm the tissues with 3–5 minutes of light massage.
- Palpate Jia Ji and BL points and identify 2–4 target points for the session.
- Apply sustained pressure 45–90 seconds per point, repeat 2–3 times.
- Use distal BL40 for descending tension where indicated.
- Finish with heat and gentle stretches, document outcomes.
Common mistakes and how to avoid them
I have seen these repeated errors in practice and they are avoidable:
- Rushing mapping: I once skipped precise localization and treated the wrong segment; result—minimal relief. Always mark spinous landmarks and confirm with patient feedback.
- Over-pressuring near the spine: I pushed too hard over the midline on a client with recent surgery and caused increased soreness. Avoid deep pressure directly on the spinous processes and ask about surgical history.
- Neglecting distal points: I treated only the lumbar fascia and missed the hamstring referral; adding BL40 and gluteal trigger release produces better functional gains.
- Not recording responses: I failed to note pre/post pain scores and couldn’t track progress. Use a simple session log to refine point selection.
When to call in a professional
Call a licensed acupuncturist or medical practitioner if you observe any of the following:
- Progressive neurological symptoms (numbness, weakness, loss of bowel/bladder control).
- No improvement after 2–4 professional sessions or worsening pain despite correct self-care.
- Red flags listed earlier (fever, unexplained weight loss, signs of systemic disease).
- Desire for needle-based treatment — only licensed practitioners should perform acupuncture.