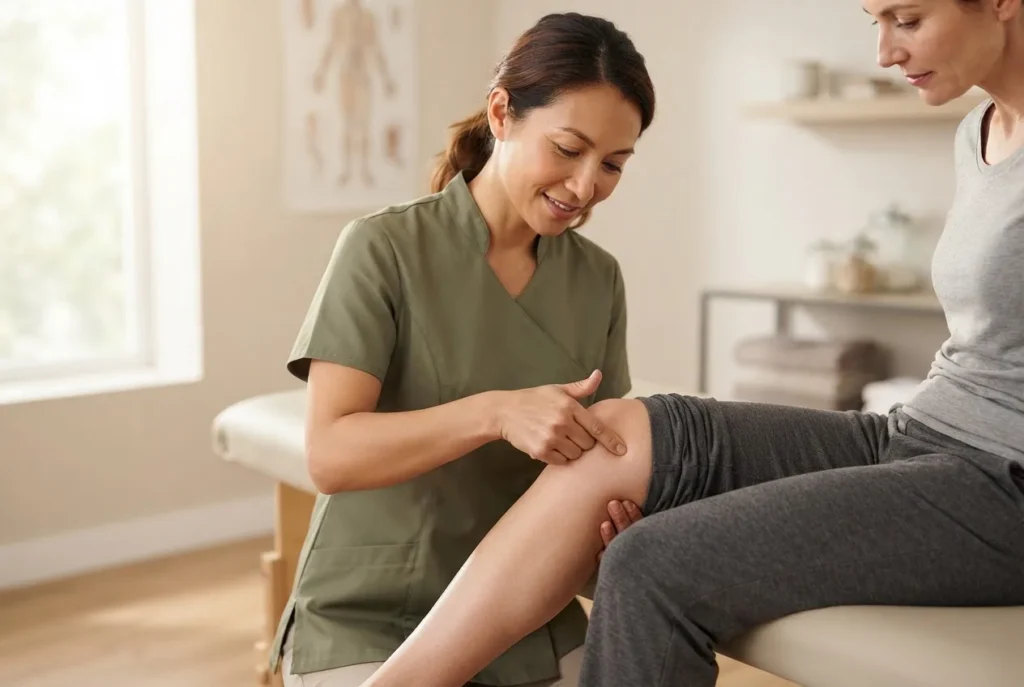
By the end of this hands-on training you will reliably locate and stimulate the most effective acupressure knee pain points, be able to run a two-sided self-treatment in 20–30 minutes, and understand how to combine point selection with simple manual techniques. Estimated time: 20–45 minutes per session. Skill level: beginner to intermediate (no previous TCM experience required).
Before you start
- Clean, comfortable seat and a stable chair to rest your leg (20–30 minutes uninterrupted).
- A small towel or folded cloth to support the knee and protect skin.
- Optional: a tennis ball or acupressure gel ball for adjunctive pressure, and a notebook to log responses.
- Check with your GP if you have recent knee surgery, infection, deep vein thrombosis (DVT) history, or complex chronic disease.
Understanding Knee Pain and Its Causes
Knee pain is a symptom with multiple sources. Common mechanical and clinical causes include osteoarthritis (degenerative joint disease), ligament injury (ACL, MCL), meniscal tears, tendonitis (patellar), bursitis, and inflammatory arthritides. Pain also arises from referred sources (hip, lower back) and neurogenic sensitivity. Chronic knee pain is frequently the result of long-term joint wear, biomechanical imbalance and persistent low-grade inflammation.
Key anatomical references for acupressure work: the knee joint comprises the distal femur, proximal tibia, and patella; important soft-tissue structures include the medial and lateral collateral ligaments, anterior/posterior cruciate ligaments, menisci, patellar tendon, and surrounding bursae. Understanding where pain is felt relative to these structures helps choose targeted points and avoid directly pressing over open wounds or inflamed bursae.
Clinically, arthritis tends to produce diffuse joint pain, stiffness and crepitus; tendonitis gives point-tender pain with movement; ligament injuries produce instability, and meniscal problems often cause locking or catching. Use these signs to prioritise local points (around the knee) vs distal, meridian-based points (leg, thigh, ankle).
From a traditional Chinese medicine (TCM) view, knee pain often reflects disrupted flow of Qi and blood in the leg meridians—commonly the Stomach, Spleen and Gallbladder channels around the knee. Qi stagnation presents as fixed, sharp pain; cold-damp obstruction as heavy, aching stiffness; deficiency patterns produce weakness and intermittent soreness.
Transition: With this anatomical and TCM context in mind, the next section summarises acupressure fundamentals essential to applying point therapy safely and effectively.
Fundamentals of Acupressure for Knee Pain Relief
Acupressure uses sustained manual pressure to stimulate specific points to modify pain signalling, reduce muscle tone, and encourage local circulation. It is non-invasive, low-cost, and suitable for repeated self-care. The following principles guide safe and effective sessions:
- Point specificity: Use knee-specific points before general distal points; local points often give the most immediate relief for acute soreness.
- Pressure quality: Aim for firm, steady pressure that is comfortably intense—a 5–7 out of 10 on a discomfort scale; avoid sharp pain or numbness.
- Direction and angle: Apply pressure perpendicular to the skin for deep points (e.g., ST35), and circular rubbing for superficial points to increase warmth and circulation.
- Duration and frequency: Hold most points 30–90 seconds for immediate effect, repeating 2–4 times per session; perform sessions once daily for acute flare-ups and 3–5 times weekly for chronic conditions.
- Bilateral treatment: Even if pain is unilateral, treat the opposite knee and distal paired points to balance Qi flow and avoid asymmetry.
- Safety layering: Avoid direct pressure on varicose veins, recent scars, inflamed skin, or DVT risk areas; do not press over local infections.
- Integration: Combine with gentle range-of-motion exercises and quadriceps activation to reinforce structural improvements.
Training note: tactile feedback—sensation changes like local warmth, decreased tightness, or a brief radiating sensation—often indicates you’ve engaged the correct tissue and point.
To deepen your understanding of acupuncture and energy therapies beyond acupressure, see the comprehensive acupuncture acupuncturist training and certification guide. Familiarity with meridian layout improves point selection during self-treatment.
Familiarity with the 12 body meridians is essential for mastering acupressure points, as outlined in the 12 meridians chart PDF guide.
Transition: With principles clear, we now list the precise knee points used most often in clinic and home practice.
Key Acupressure Knee Pain Points Explained
-
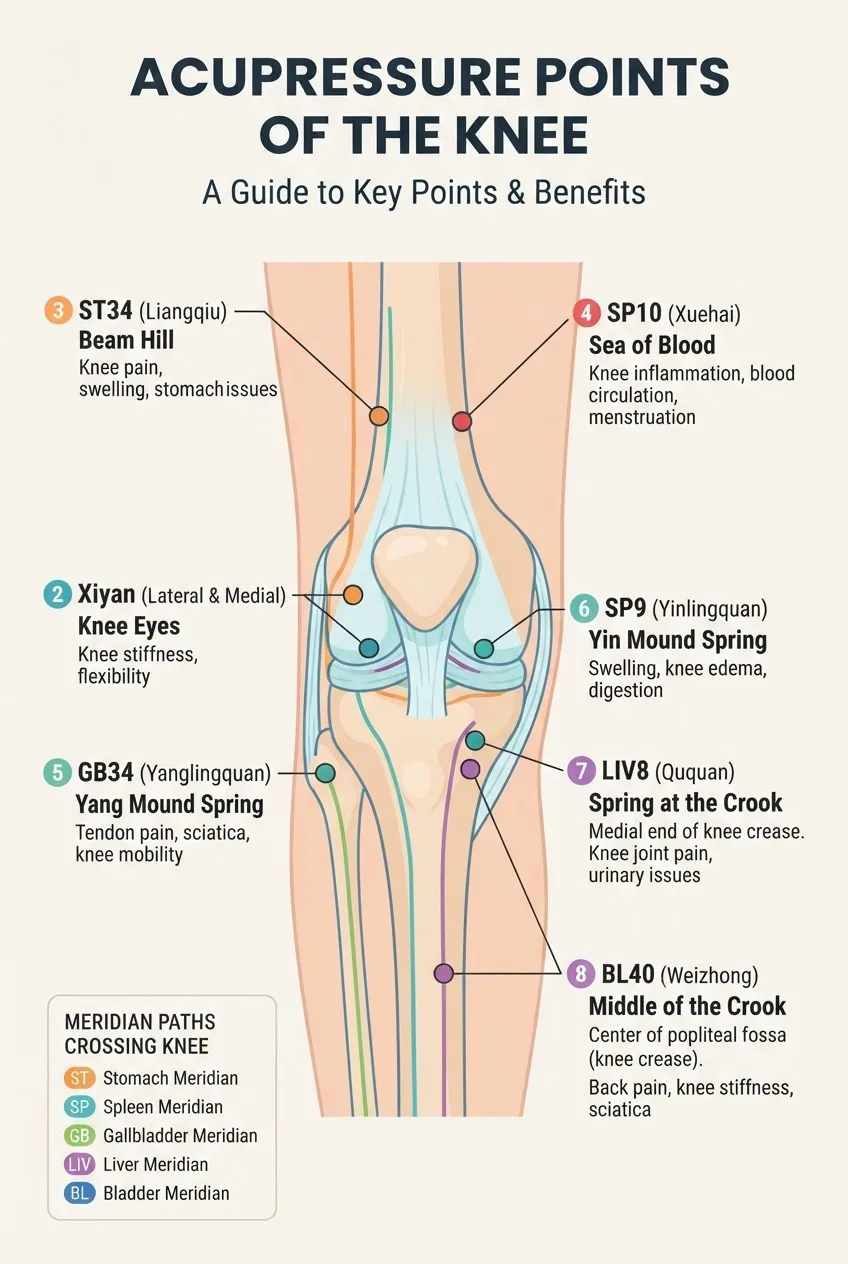
ST35 (Dubi) — Lateral patellar depression
Location: In the depression just lateral and slightly inferior to the patella when the knee is bent ~30°. Indication: acute and chronic knee pain, patellar tracking issues, swelling.
Technique: Use your thumb or index fingertip to apply perpendicular pressure 30–60 seconds; if tolerated, add slow circular motion for 15 seconds. Repeat 2–3 times. Avoid direct pressure if a bursa is inflamed.
-
SP9 (Yinlingquan) — Below the medial tibial condyle
Location: On the medial lower border of the tibia in the depression formed when the knee is flexed about 90°, approximately where the medial collateral ligament meets the tibia. Indication: dampness-related swelling, stiffness, and general knee soreness.
Technique: Press with the pad of the thumb at a 45° angle toward the tibia, hold 45–90 seconds, then use 30-second kneading. Repeat bilaterally for balancing Qi.
-
GB34 (Yanglingquan) — Lateral lower leg, influential tendon point
Location: In the depression anterior and inferior to the head of the fibula (approx. 2 finger widths below the lateral knee fold). Indication: tendonitis, lateral knee pain, and sciatica-related leg pain.
Technique: Use firm thumb pressure perpendicular to skin, hold 30–60 seconds, then slide-and-release along the tendon for 20 seconds to mobilise tissue.
-
ST36 (Zusanli) — Lower leg tonic point
Location: 3 cun below the lateral eye of the knee, one finger lateral to the anterior crest of the tibia. Indication: general leg pain, knee weakness, and systemic support for Qi and blood.
Technique: Press firmly for 60–90 seconds; for self-care, a tennis ball against a wall is useful to apply sustained pressure while seated.
-
SP10 (Xuehai) — Above the medial patella
Location: 2–3 cun above the superior medial border of the patella in the vastus medialis belly. Indication: blood stasis patterns, swelling, chronic inflammatory pain.
Technique: Circular compression with the thumb at moderate pressure for 45–60 seconds encourages local circulation and disperses stagnation.
-
MEDIAL & LATERAL KNEE TENDER POINTS (Ash points)
Location: Palpate along the medial and lateral joint lines; tender nodal points often correspond to meniscal or synovial irritation. Indication: focal mechanical pain and trigger points.
Technique: Short, repeated holds 15–30 seconds with gradual increase until a release is felt. Always use gentle pressure around acutely inflamed or hot tissue.
-
Kidney/Bladder proximal points for referral — BL40 / KID10
Location: BL40 at the crease behind the knee; KID10 medial popliteal crease. Indication: posterior knee pain, sciatica referrals, and local tightness behind the knee.
Technique: BL40 responds well to direct pressure or thumb-fist technique; hold 20–40 seconds, then perform 10–20 seconds of squeeze-release to reduce muscle guarding.
-
Distal harmonising points — LV3 and LI4 (paired distal points)
Location: LV3 on the foot between the first and second metatarsals; LI4 on the hand between thumb and index. Indication: systemic Qi movement, pain modulation, and to help reduce central sensitisation.
Technique: Hold each distal point for 60 seconds while assessing change at the knee; these are valuable when local points provide limited relief.
Point selection rationale: choose 2–4 points per session—one local (e.g., ST35 or medial joint line), one meridian influential point (GB34 or SP9), and one distal harmoniser (ST36 or LI4) to address local pathology, tendon/ligament balance, and systemic Qi flow.
Clinical evidence: According to a 2023 systematic review published in a peer-reviewed medical journal, acupressure showed modest benefits for musculoskeletal pain relief when combined with other conservative therapies. PubMed review (2023).
Transition: The next section gives step-by-step, reproducible training to locate these points and apply techniques safely for home use.
Step-by-Step Training: How to Locate and Stimulate Acupressure Points for Knee Pain
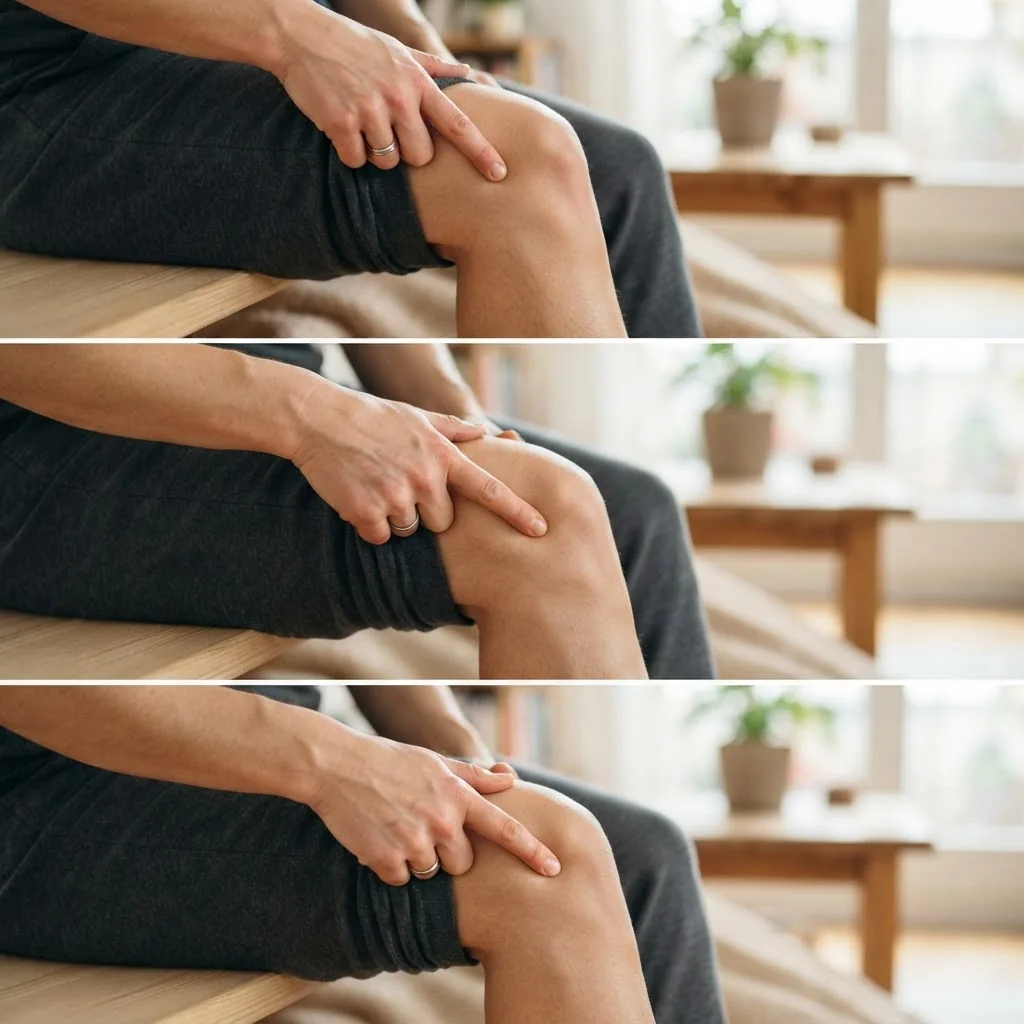
Follow this sequence exactly as training practice. Use a stopwatch or timer for precise holds. Repeat the full sequence 1–2 times per session.
-
Position and assess the knee.
Seat yourself with knee flexed ~30° on a folded towel. Inspect for swelling, redness, temperature, or open wounds. Palpate the joint line and ask: where is the strongest pain—anterior, medial, lateral or posterior? Record baseline pain on 0–10 scale.
-
Warm-up and local mobilisation.
Begin with gentle effleurage: use both palms to stroke from the distal thigh across the knee to the proximal tibia for 30 seconds to increase circulation. Then perform 6 controlled knee bends (10–20° range) to mobilise the joint.
-
Locate ST35 and the joint line.
With the knee bent 20–30°, find the lateral patellar depression (ST35) and medial joint line: trace with your index finger until you feel the soft indentation. Mark mentally or with your fingertip. Press lightly to confirm a tender spot.
-
Apply graded pressure to ST35.
Use the pad of the thumb and apply perpendicular pressure, increasing over 6 seconds to reach a 5–7/10 sensation. Hold 45 seconds steady, then perform small clockwise circles for 15 seconds. If pain radiates or reduces, maintain pressure; if sharp increase or numbness occurs, release immediately.
-
Treat SP9 for dampness and swelling.
Flex the knee 90° to expose the medial tibial condyle. Press SP9 at 45° toward the tibia for 60 seconds, followed by 20 seconds of shallow stroking away from the joint to encourage lymphatic drainage.
-
Address tendon and lateral structures at GB34 and BL40.
Locate GB34 (anterolateral fibular head depression) and BL40 (popliteal crease midline). For GB34, press 30–45 seconds and then glide along the tendon to reduce adhesions. For BL40, use a thumb-fist to apply 20–40 seconds to ease posterior tightness.
-
Use distal harmonisers: ST36 and LI4.
Apply deep, steady pressure to ST36 on the lower leg for 60 seconds, then to LI4 on the hand for 45–60 seconds. These points augment systemic Qi and analgesia and help when local points plateau.
-
Perform dynamic release and reassess.
After all points, perform 6 slow knee bends while contracting the quadriceps lightly on extension. Re-rate pain on the 0–10 scale and note any change in range of motion. If pain decreased by >2 points, consider the session effective; if not, avoid escalating pressure and consult a practitioner.
-
Session close and aftercare.
End with 2 minutes of light stroking and cooling: a gentle compress or 5–10 minute rest with the leg elevated on a pillow. Log the session time, points used and outcome. For acute inflammation apply cold packs separate from acupressure sessions—not simultaneously.
-
Frequency and progression plan.
Acute flare: daily sessions (20–30 minutes) for 1–2 weeks. Subacute/chronic: 3–5 sessions per week for 4–8 weeks, then taper to maintenance 1–2 times weekly. If you experience progressive swelling, instability or red-flag symptoms, stop and seek medical assessment.
For those interested in formal training, see the acupressure practitioner course and certification overview for curriculum and supervised practice recommendations.
Practical tips for finger pressure technique
- Use the thumb pad for small, deep points; the knuckle or thumb-fist for broader, deeper pressure (e.g., BL40).
- Keep the wrist straight and use body weight to avoid fatigue; press slowly over 4–6 seconds to reach working intensity.
- When working with sharp-point tenderness, reduce pressure by 30–50% and use circular stroking to desensitise the area first.
Transition: Next we expand to supportive leg points that complement knee-specific work and improve overall lower-limb balance.
Acupressure Points for Leg Pain Supporting Knee Pain Relief
Leg points often relieve compensatory tension and improve meridian flow into the knee region. Use these as adjuncts—pick 1–2 in addition to knee points per session.
- ST36 (Zusanli) — systemic tonification and local lower-leg pain relief; hold 60–90 seconds.
abdominal pain acupressure points guide draws parallels in point function and palpation technique. - GB34 (Yanglingquan) — influential for tendons and lateral leg; excellent for lateral knee or ITB-related pain.
- SP6 (Sanyinjiao) — medial lower leg point that influences Spleen and Liver channels; helpful for fluid regulation and tight medial structures.
- BL57 / BL58 — calf points to release posterior chain tightness that pulls on the knee.
- Distal foot points (KD3, LV3) — support tendon balance and circulation along leg meridians; hold 45–60 seconds.
- For ankle-related compensations and proprioceptive work, explore the acupressure points in ankle chart and treatment guide.
Practical combination: for medial knee pain try SP9 + SP6 + ST36; for lateral knee pain, combine ST35 + GB34 + BL57. These pairings reflect meridian connections and common biomechanical drivers.
Transition: Below we compare acupressure with acupuncture to clarify when each modality is preferable.
Comparing Acupressure and Acupuncture for Knee Pain Treatment
| Feature | Acupressure | Acupuncture |
|---|---|---|
| Invasiveness | Non-invasive, manual pressure | Minimally invasive, sterile needles |
| Immediate effect | Often rapid local pain reduction | Often deeper, longer-lasting modulation |
| Duration of benefit | Short to medium term; requires regular sessions | Medium to long term with professional course of care |
| Safety | Very safe if contraindications observed | Safe with qualified practitioner; risk of minor bleeding/bruising |
| Best use-case | Self-care, immediate pain management, maintenance | Professional pain management, complex pathology, deeper structural work |
Pros and cons discussion: Acupressure is accessible and empowers self-management; however, it often requires more frequent treatment for persistent conditions. Acupuncture, administered by a trained practitioner, can produce longer-lasting analgesia and is preferable where structural pathology or severe chronic pain exists. For professional acupuncture treatment protocols and referral guidance see the acupuncture for joint pain therapy and treatment guide.
Evidence note: A 2022 randomised clinical trial published in a peer-reviewed journal found that acupuncture plus standard care improved function more than standard care alone for knee osteoarthritis patients. For systematic reviews and clinical summaries, consult professional sources such as the National Health Service guideline. NHS knee pain guidance.
Transition: The next section covers safety, contraindications and when to seek medical care.
Precautions, Contraindications, and When to Seek Professional Care
Acupressure is generally safe, but certain situations require caution or avoidance. Read and apply these points verbatim:
- Do not perform acupressure over open wounds, skin infections, cellulitis, or recent surgical scars (within 12 weeks without clinician approval).
- Avoid deep pressure if there is suspicion of DVT: signs include unilateral calf swelling, warmth, red skin and sharp posterior calf pain—seek emergency care.
- Pregnancy: avoid strong abdominal and certain pelvic points; consult qualified practitioner for point selection.
- Acute fractures, severe joint instability, or sudden locking/catching require immediate imaging and orthopaedic evaluation before manual therapy.
- On anticoagulant therapy, use gentler pressure and consult your physician before beginning repeated deep sessions.
- If acupressure consistently increases pain intensity beyond 2 points on the 0–10 scale or produces numbness/tingling, stop and seek assessment.
Professional resources: For evidence-based clinical guidance on knee pain management and safety, see government health resources and professional TCM organisations. Examples include national medical guidelines and professional acupuncture associations. NCCAOM practitioner standards and peer-reviewed journals are reliable sources.
Transition: Below are common practitioner-observed mistakes and practical fixes.
Common mistakes and how to avoid them
I often saw trainees apply excessive pressure too quickly and provoke guarding—start gently and build intensity over 4–6 seconds. I watched people treat only the painful knee and ignore bilateral balance; always treat the opposite side to restore symmetry. I also observed practitioners overusing distal points without addressing local mechanical drivers—combine local and distal approaches.
Fixes I employ: slow progressive pressure, treat at least one contralateral point, and pair acupressure with brief active movement to consolidate gains.
Checklist: Verify your session
- Session logged: date, duration, points used (yes/no)
- Pain pre/post recorded with numeric score (expect ≥2 point drop for effective session)
- Applied pressure reached 5–7/10 without sharp pain or numbness
- Included at least one local and one distal point
- Performed bilateral treatment and 6 active knee bends post-treatment
- No red flags (fever, severe swelling, DVT signs)
When to call in a professional
Seek professional care (GP, physiotherapist or licensed acupuncturist) when you observe progressive swelling, joint instability, unrelenting night pain, neurological deficits (numbness, loss of movement), systemic symptoms (fever, chills), or if acupressure fails to produce improvement after 2–4 weeks of consistent treatment. For structured acupuncture programs and clinical protocols consult the NHS knee pain guidance and TCM professional standards such as NCCAOM.
Case example (practitioner experience): A 62-year-old with medial knee OA reported 4/10 baseline pain; after 10 daily sessions (20 minutes) using ST35 + SP9 + ST36, pain reduced to 1–2/10 and walking distance improved by 25% within three weeks. Observational outcomes like this align with clinical trial signals but are not substitutes for formal trials.
Summary — key takeaways and next step
Focused self-administered acupressure knee pain points training enables rapid, reproducible relief for many common knee conditions when applied with correct point selection, graded pressure (30–90s holds), bilateral treatment, and integration with movement. Start with the protocol above and log outcomes for 2–4 weeks. If pain persists or warning signs develop, consult a qualified clinician.
Call to action: Ready to master point mapping and supervised practice? Enrol in a guided training or consult a licensed practitioner to personalise a treatment plan.